Step by Step Setup
Level: Beginner to Intermediate | Audience: Composer, technician, student, studio user.
Use this page when you want to build the ICST Ambisonics routing manually instead of starting only from a ready-made template.
Prerequisites
Before we begin, make sure you have Reaper, the ICST Ambisonics plugins, and any recommended 3rd-party plugins installed.
Recommended baseline before starting:
- Reaper project sample rate: 48 kHz
- All Ambisonics tracks set to 64 channels
- ICST plugin set installed and visible in the FX browser
- Audio interface output mapping verified
Creating a Reaper template
We will create the template step by step from top to bottom.
1. Prepare Reaper
- Open a new, empty Reaper session.

- Create a new track (double-click or use the menu).
- Name the track Decoder and remove the master bus.
Create all tracks with 64 channels by default and keep an eye on routing.
2. Set up decoder routing
Decoder routing for an Oktagon setup:
- Inputs: 64 channels from the Bformat Master track
- Outputs: 8 channels to the audio interface
- Open ICST AmbiPlugins Decoder in the FX window.
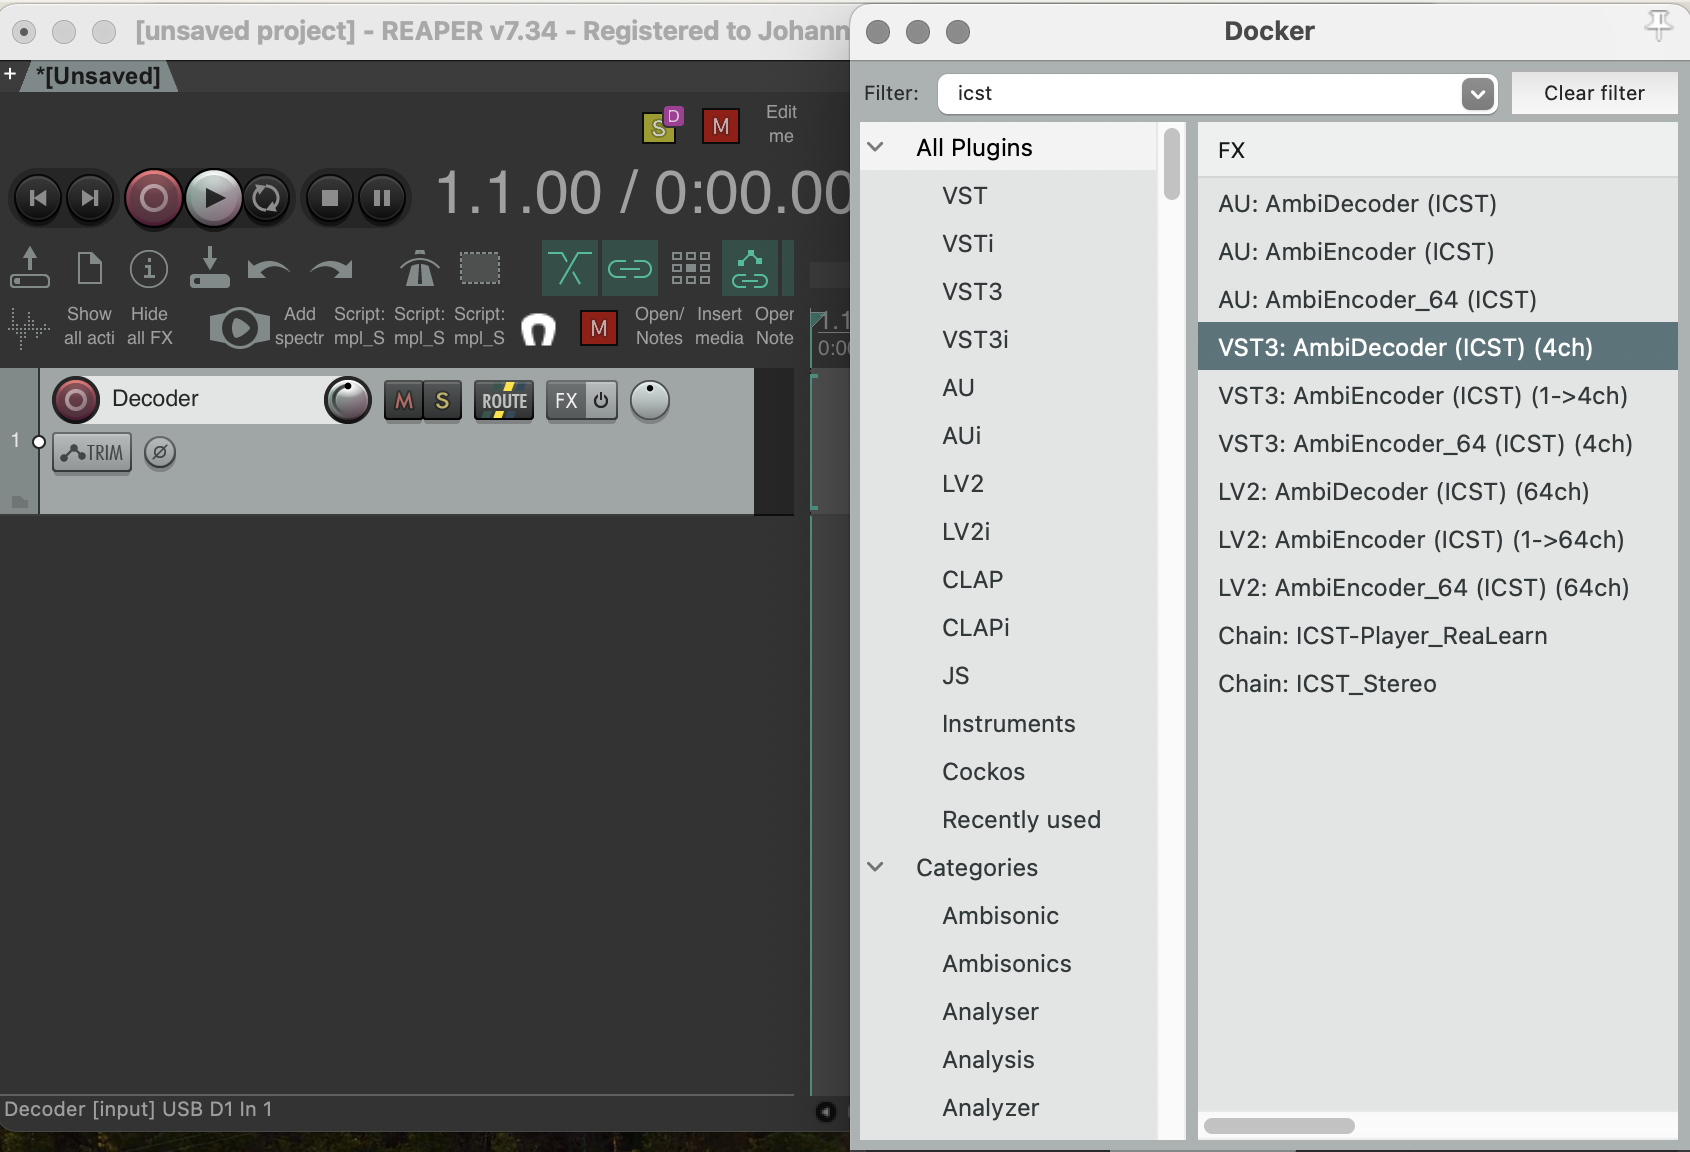
- Open the AmbiDecoder and select a speaker preset (e.g. Oktagon).
- Customize AmbiDecoder settings:
- Ambisonics weighting
- Ambisonics order (1st to 7th order)
- Run a speaker test:
- Press the Speaker Test button or test individual speakers.
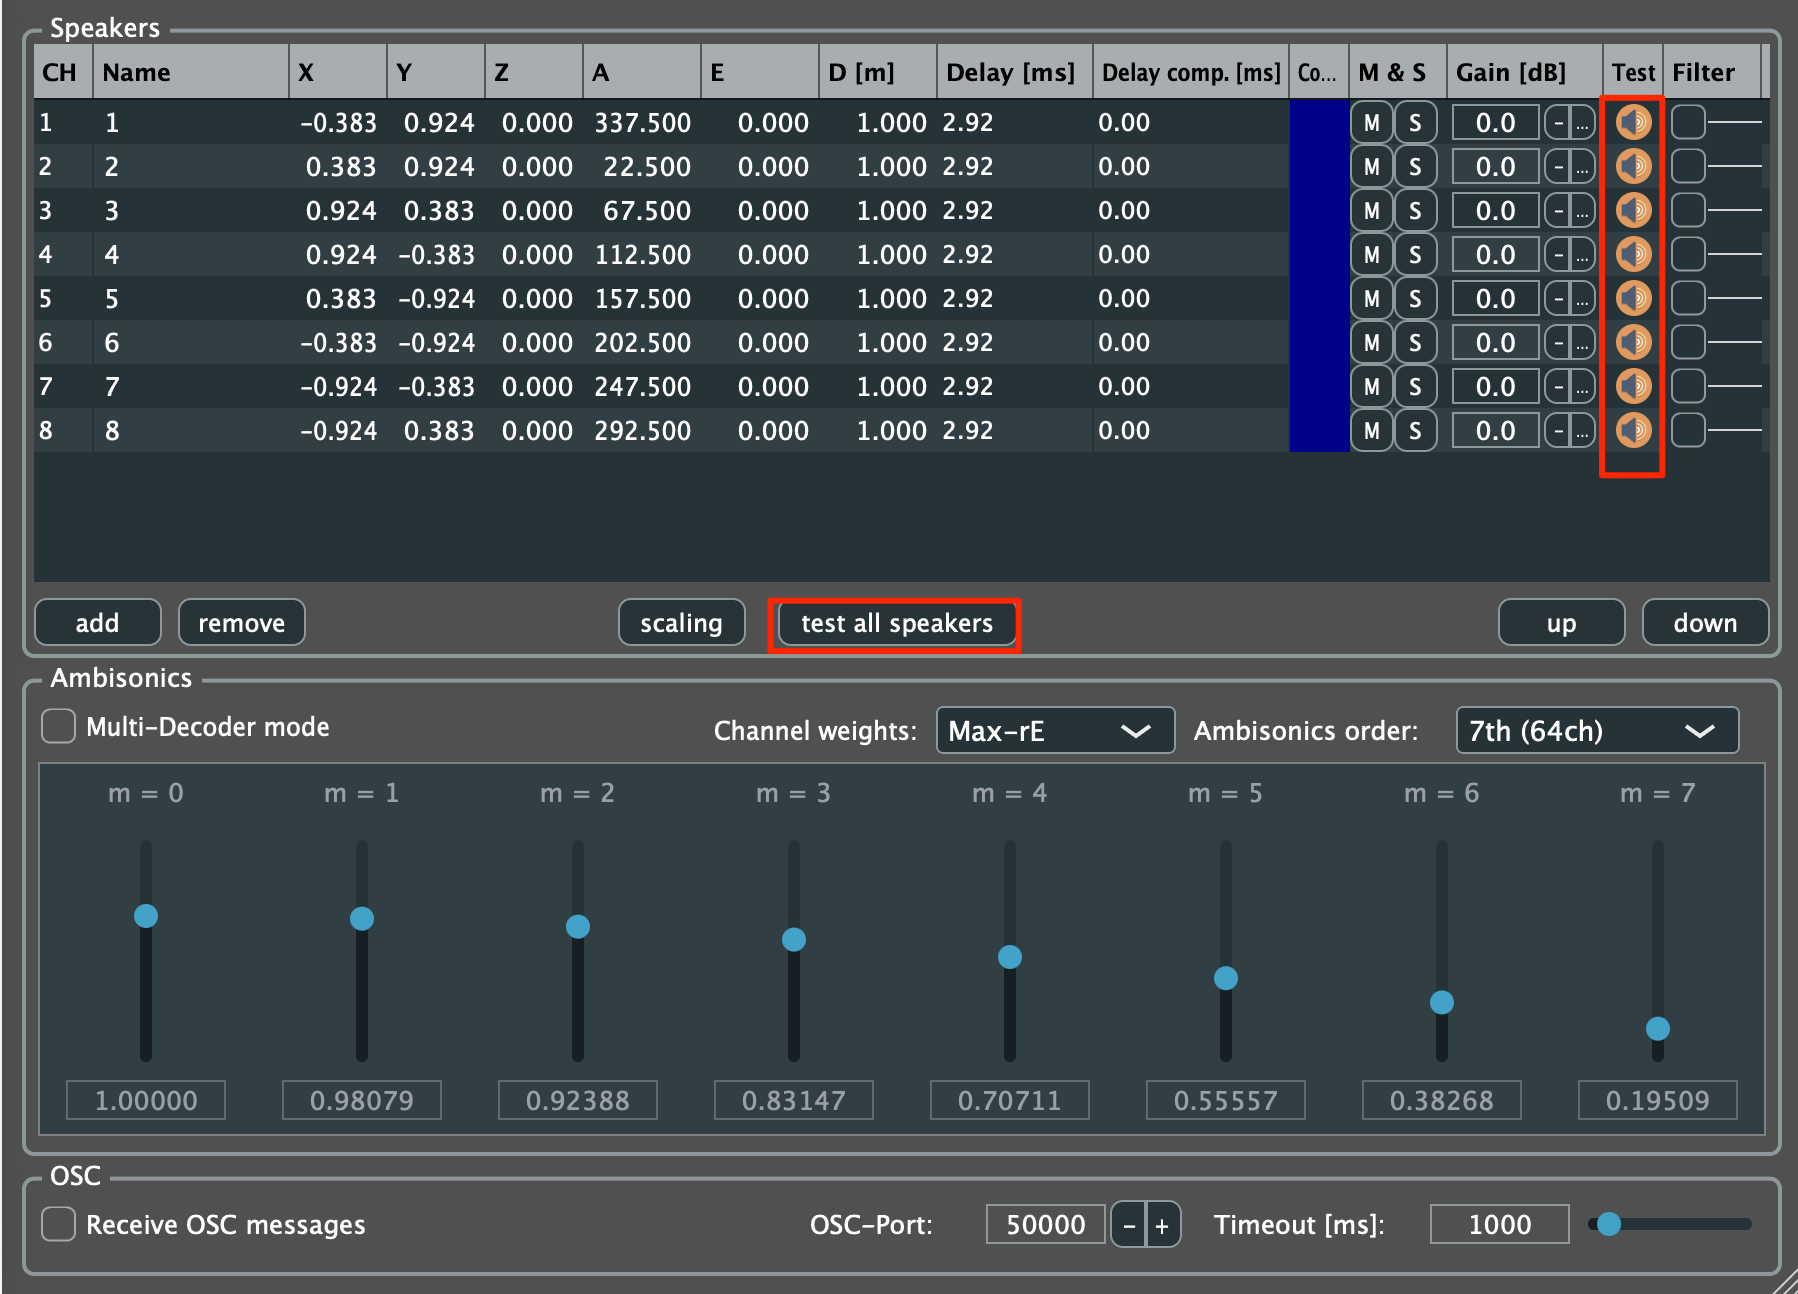
- Press the Speaker Test button or test individual speakers.
Keep an eye on output volume.
Routing sanity check (20 sec):
- Send pink noise or a test signal into the Bformat Master.
- Confirm level activity on Decoder input meters.
- Trigger speaker test and verify output order physically in the room.
3. Create a Bformat master track
Create the Bformat Master track:
- This track receives signals from:
- Ambience encoders
- B-format SFX
- B-format players
- This is the main recording/render point for the final B-format signal.
- Set the track color to red (recommended).
- Route it to the AmbiDecoder and in parallel to a binaural monitor track.
4. Create a Bformat player track
- Create a 64-channel track and route it into the Bformat Master track.
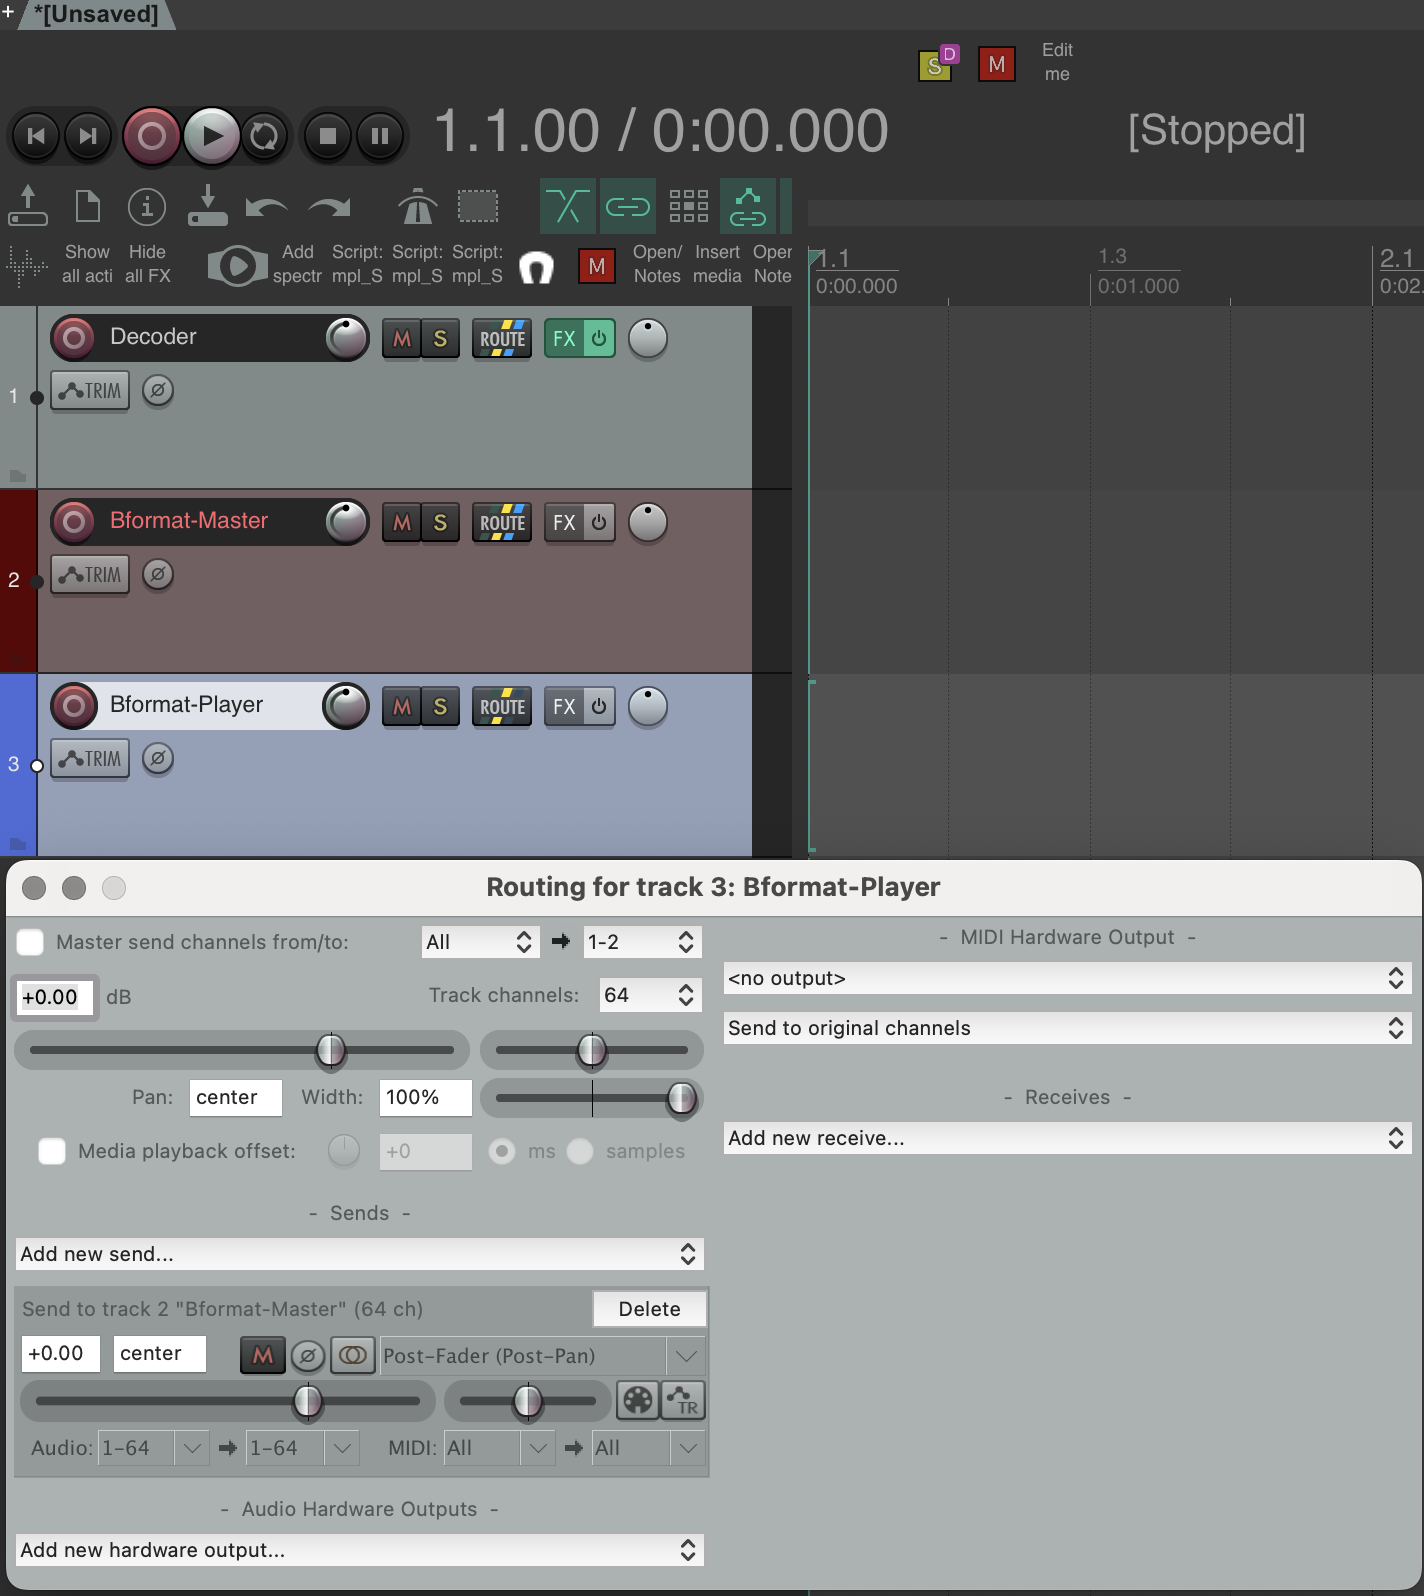
This allows B-format files from 1st to 7th order to be played.
5. Enable binaural listening
- Create a new 64-channel track and load a binaural plugin (e.g. DearVR Ambi Micro.vst3).
- Move the track to the top of your Reaper project.
- Route the output of Bformat Master to this binaural track.
- Mute AmbiDecoder if you want to monitor only the binaural output.

Compare playback with Solo/Mute between AmbiDecoder and binaural decoder.
Example below shows a 5th-order B-format Ambisonic file on the player track:
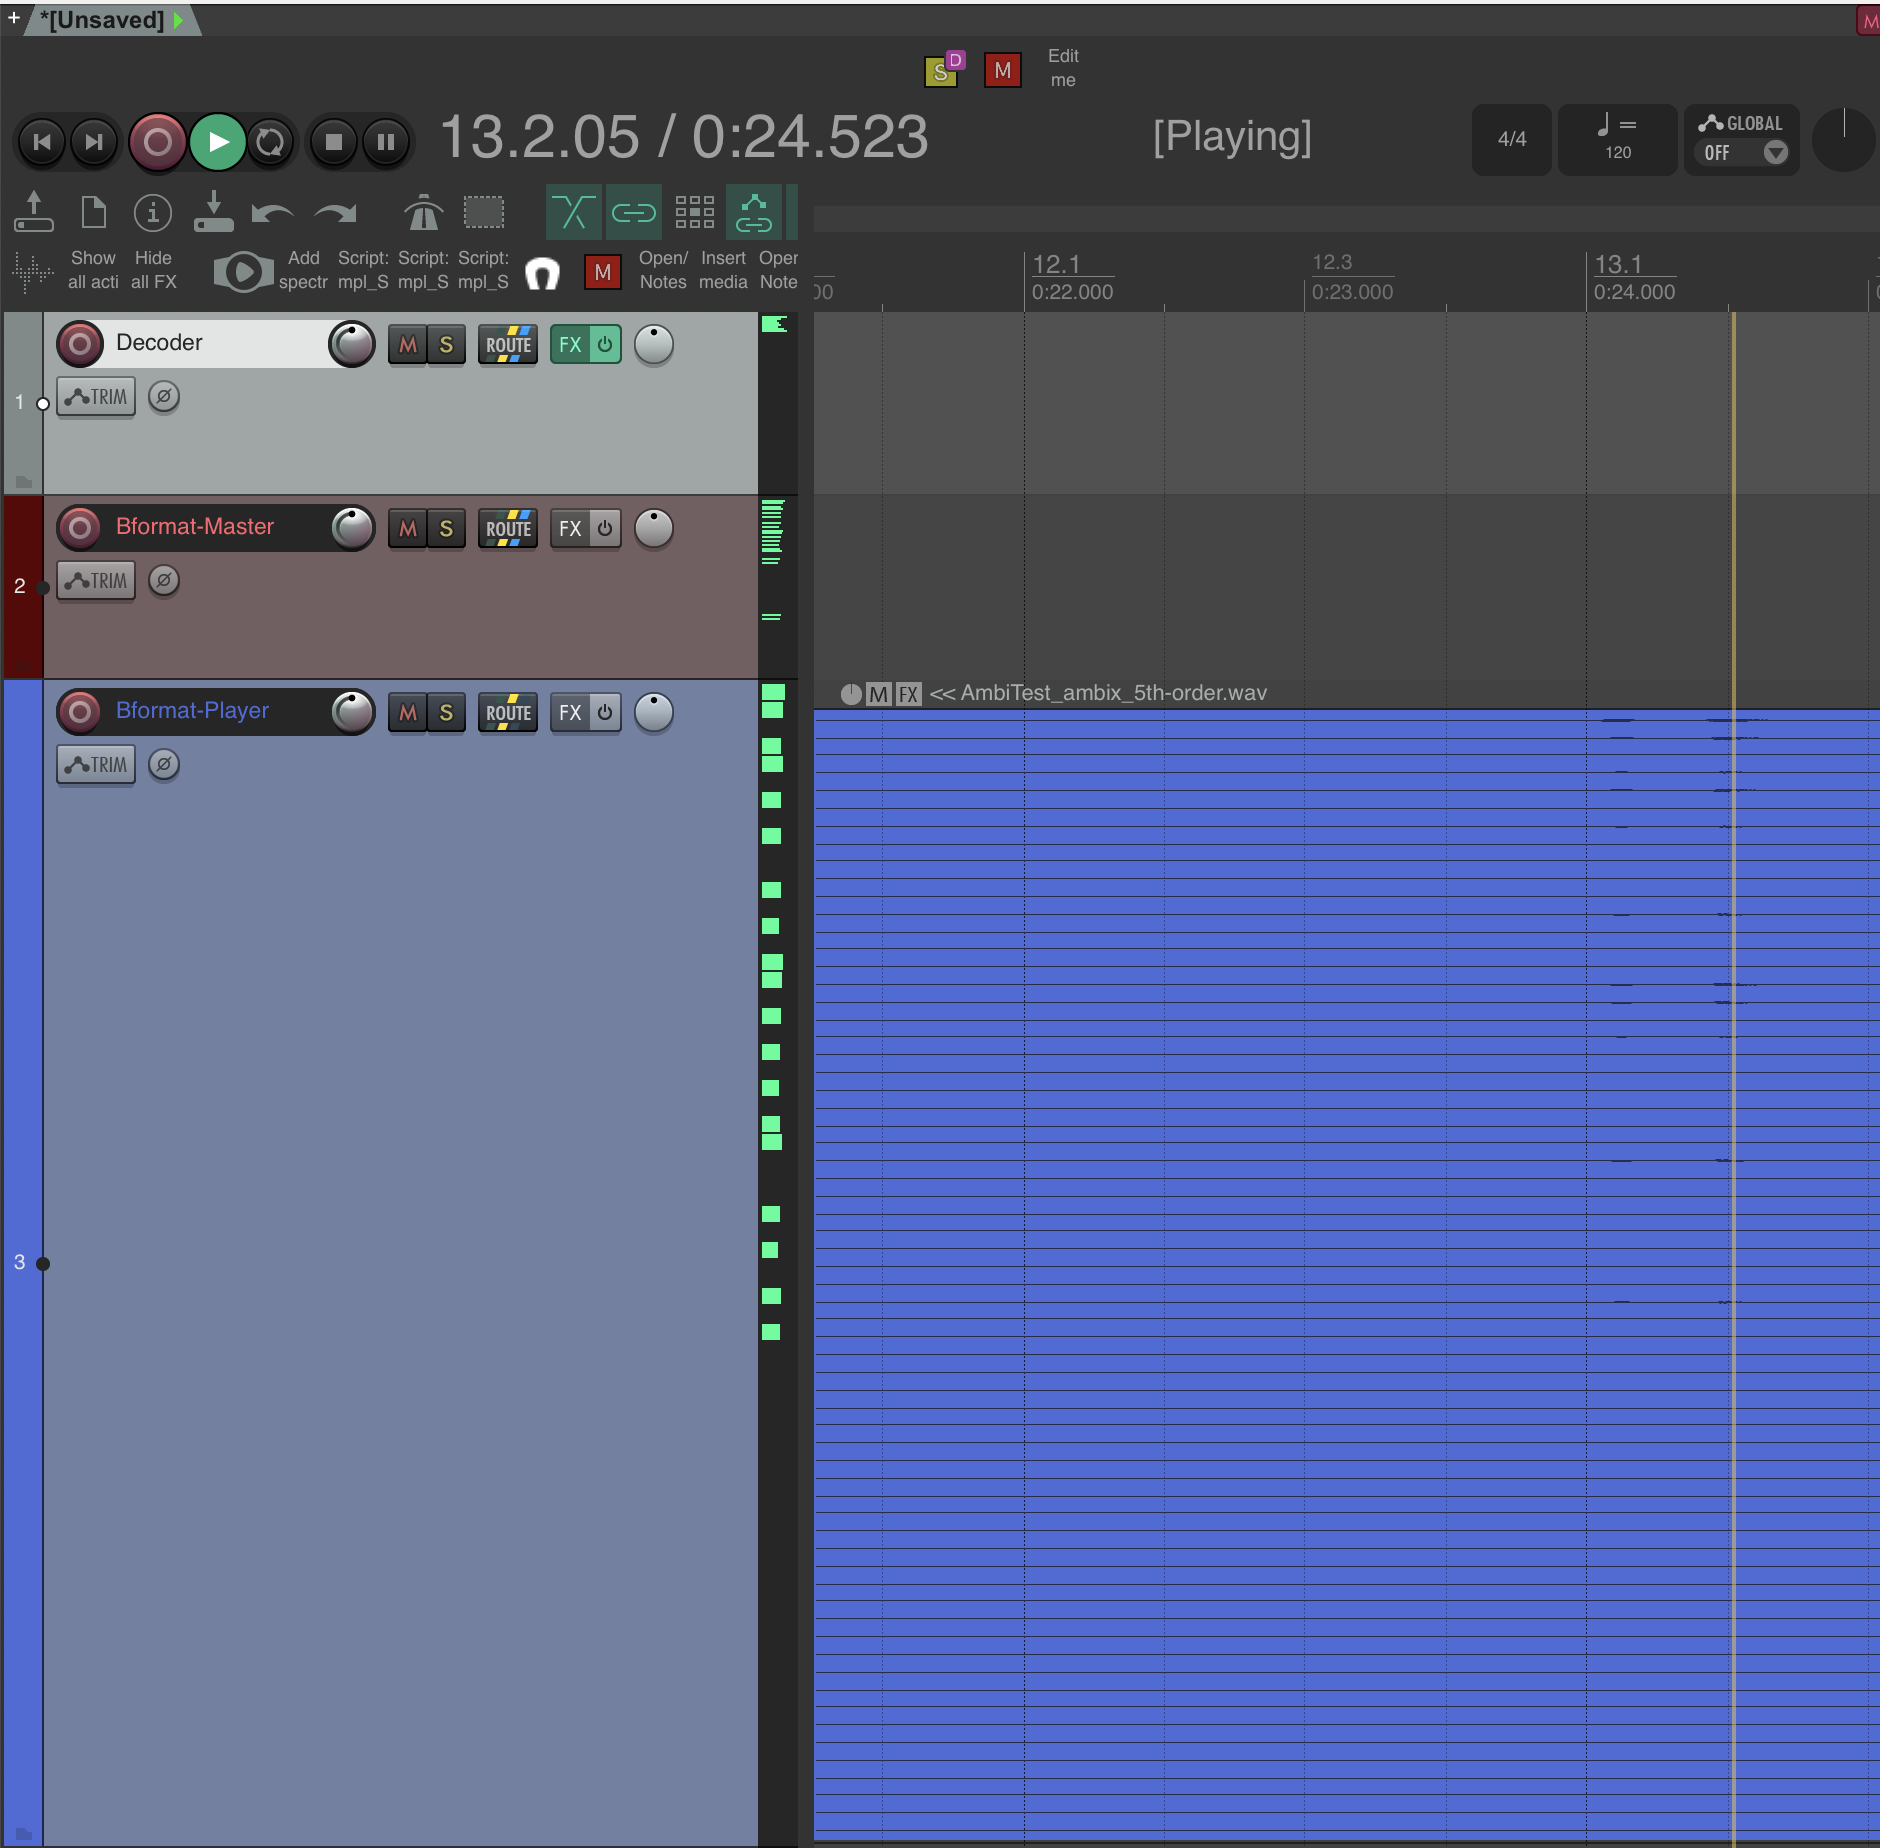 Now you can play and monitor B-format files on speakers or headphones.
Naming Convention (recommended)
Use stable names early to avoid routing mistakes:
DECODERBFORMAT_MASTERBINAURAL_MONITORSRC_01…SRC_08MULTIENCODER_8SRC
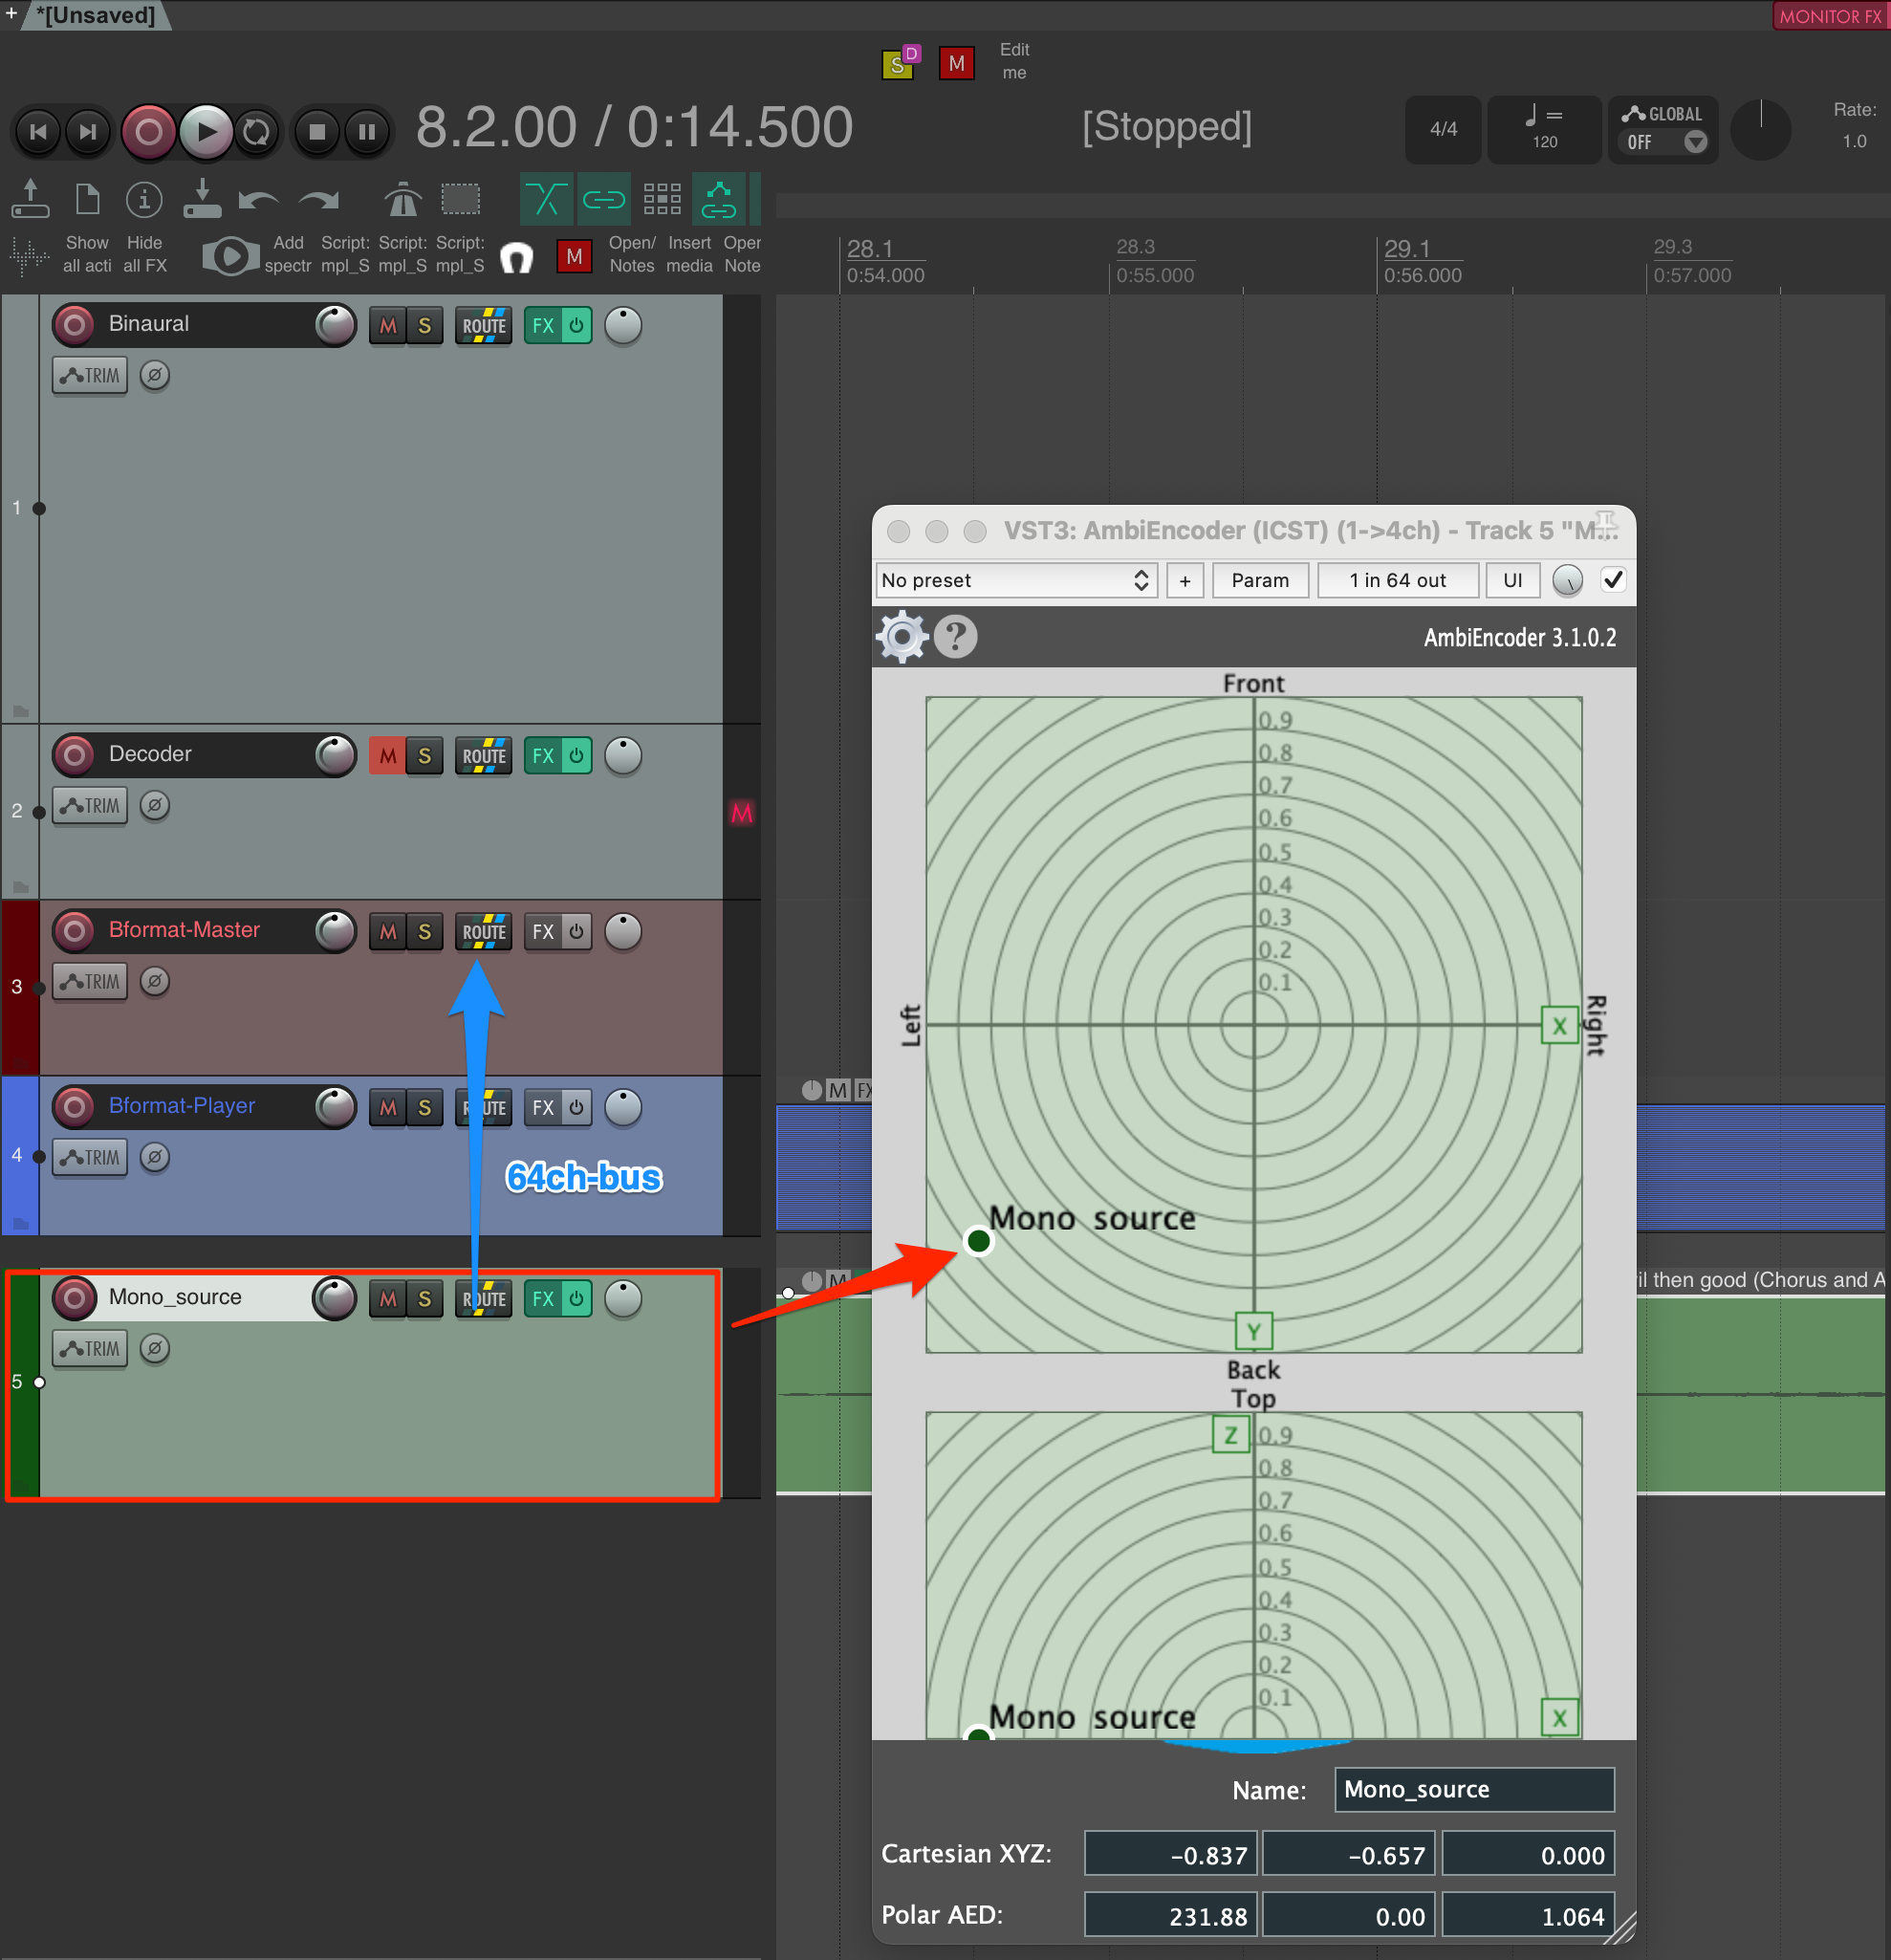
6. Mono Source & Ambisonics Encoder
- Create a new Mono Source track and load a mono audio file.
Video Tutorial: AmbiEncoder Setup
Mono AmbiEncoder overview:
- In the FX window, load the ICST MonoEncoder.
- Add an AmbiEncoder (ICST) (1-4) to the mono source.
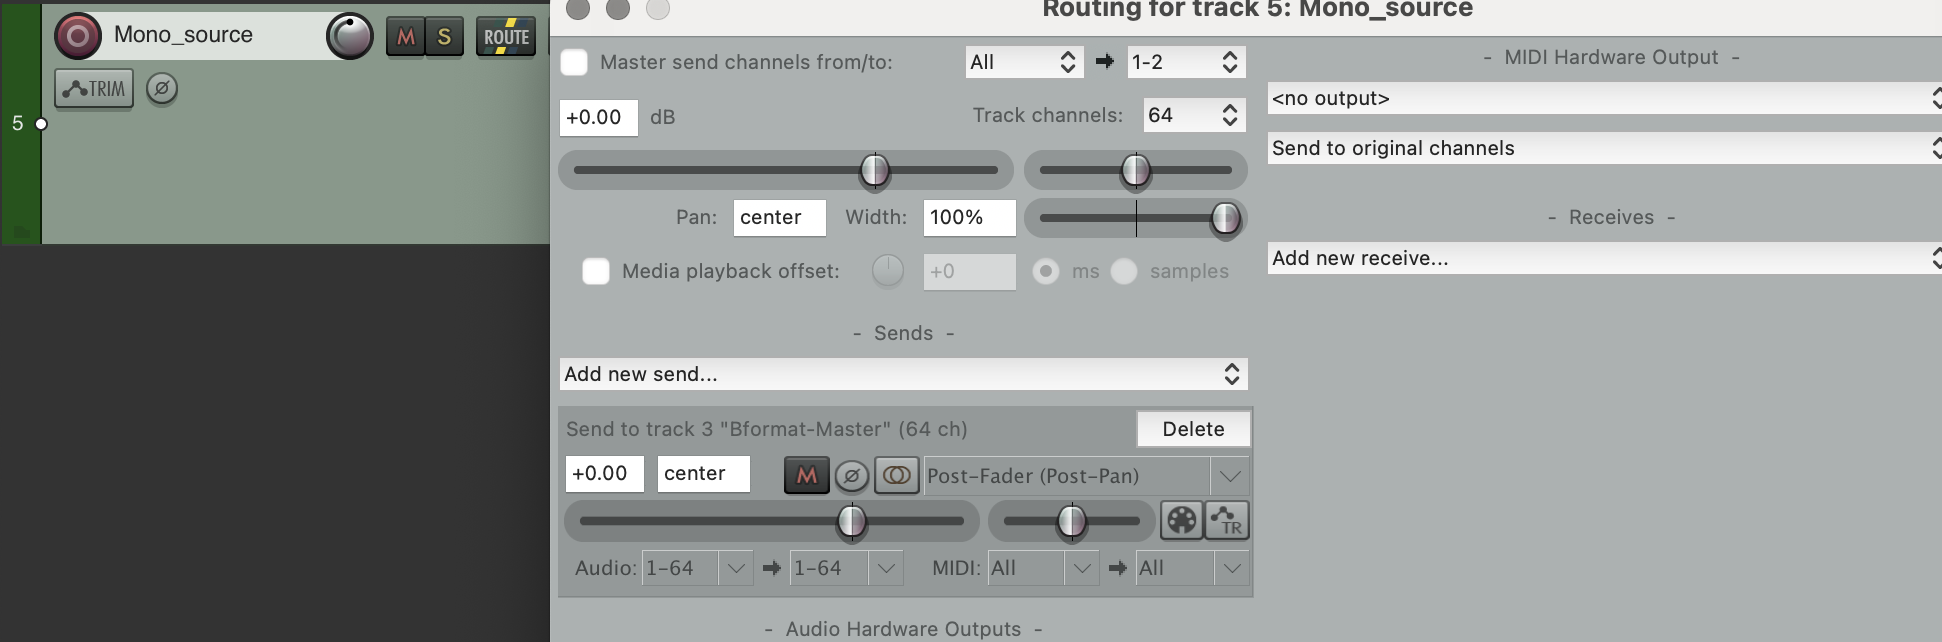
Routing:
- MonoEncoder -> 64-channel output -> Bformat Master.
7. Record motions in the Reaper track
Record motions in the MonoEncoder:
Play back saved motion:
8. Using the Multi-Encoder
In the next example, we use the Multi-Encoder:
Insert the Multi-Encoder Track
- Right-click in an empty Reaper track area and select Insert Track from Template.
- Navigate to ICST AmbiPlugins and choose ICST_AmbiEncoder_Multi_8src.
- This opens a Multi-Encoder with 8 mono sources already routed into the encoder.
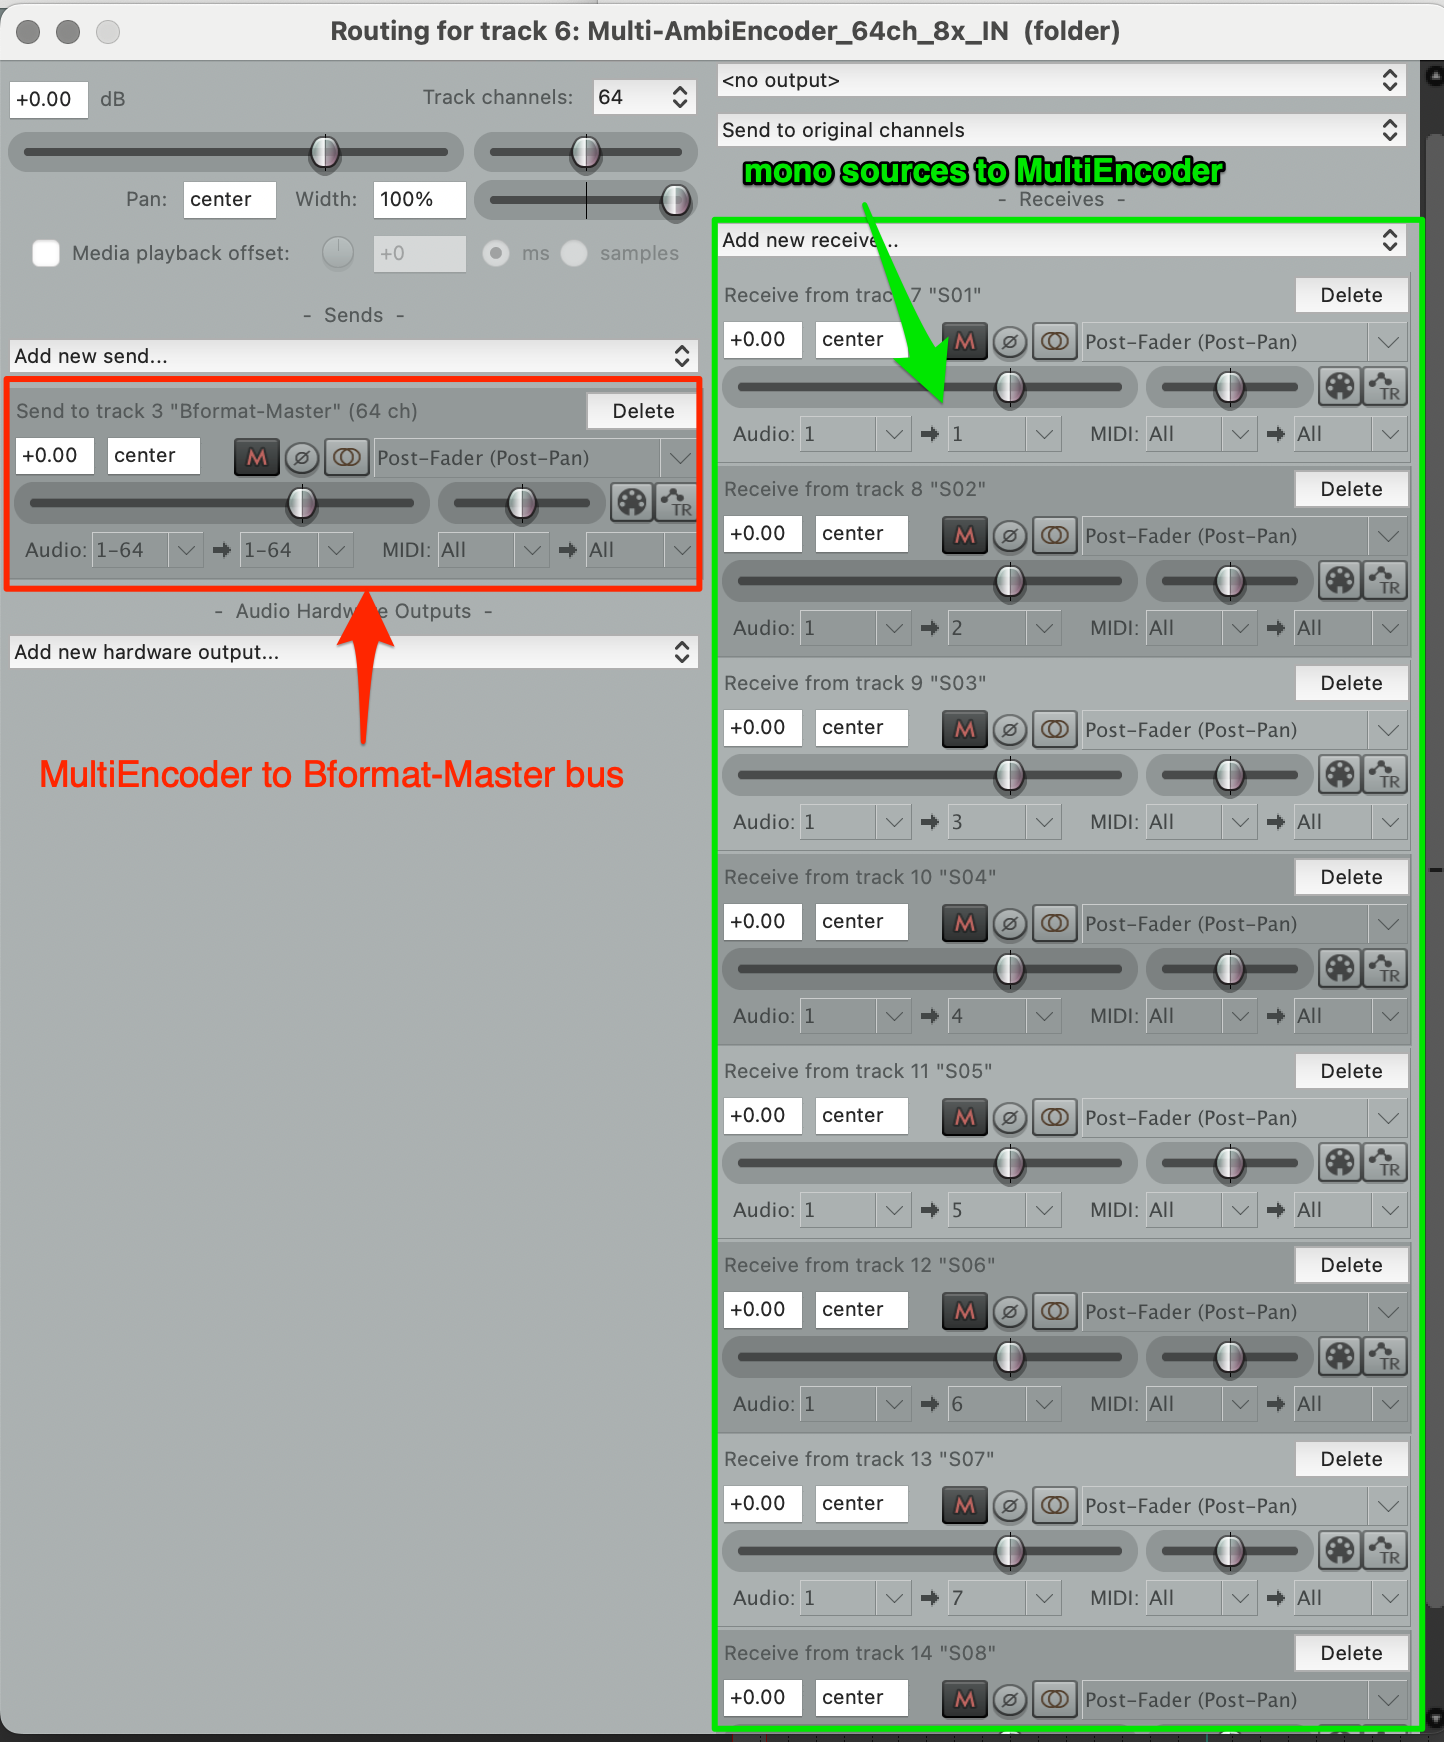
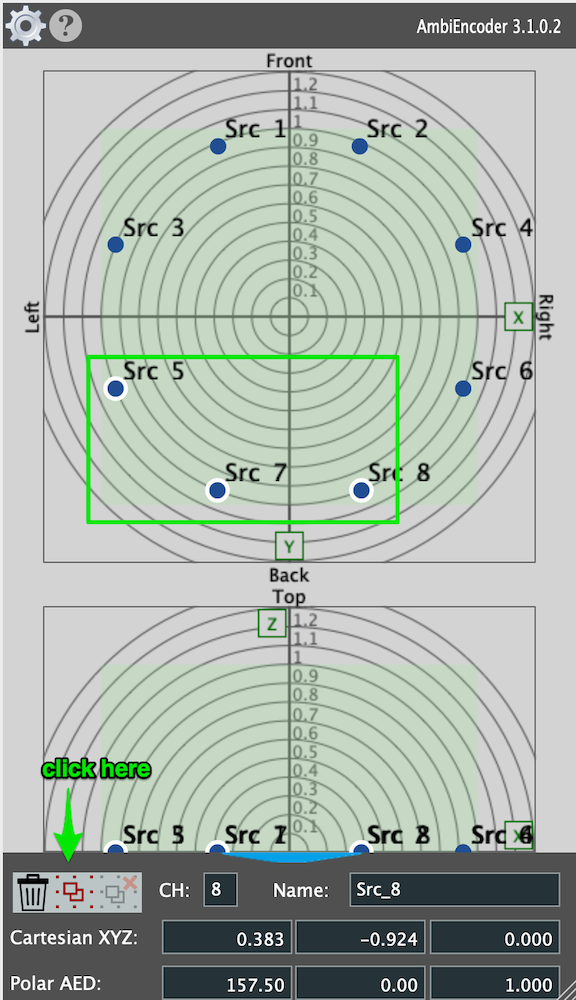
Control Sources in the Multi-Encoder
- If routing is correct, you can control the placement and movement of up to 8 sources.
AmbiEncoder Settings
- Understanding AmbiEncoder settings
- AmbiEncoder settings are central to the workflow.
- The GIF below shows key AmbiEncoder features:
Watch the AmbiEncoder Video tutorial for more details.
- ICST Distance Function
- A unique feature of the ICST Ambisonics Encoder is its distance function, developed by Martin Neukom at ICST.
- This function enables different spatial configurations, from very fast to very slow movement behavior.
For in-depth instructions, refer to the Distance tutorial.
If you work with distance, define it at the start of the project to keep XYZ scaling consistent (example: 0.0 to 1.0).
Recording & Editing Source Movements
Automation mode quick guide:
- Write: overwrite completely (best for first pass)
- Touch: write only while touching control
- Latch: keeps writing after first touch until stop
For clean results, record in Write, then refine in Touch.
- Recording Movements in the Multi-Encoder
To understand Multi-Encoder behavior, run this recording example:
- Set automation envelopes to Write mode.
- Press Play (Spacebar) and move Src_1 in the Multi-Encoder radar.
- Repeat for other sources.
 Example with Src_3:
- Manually Editing XYZ Envelopes
- To refine motion, edit XYZ envelopes manually.
- Hold Shift and click an envelope to create a new edit point.
- Move the point to adjust XYZ coordinates.
- Playing Back the Recorded Ambisonic Scene
Working with Groups
- Creating a Group in the Multi-Encoder
- In the Radar Display, select multiple Src points to form a group.
- Assign a group name (e.g. G1).
- Recording Group Movements
- Choose a recording mode:
- Latch: records after touching a source
- Touch: records only while touching
- Write: overwrites existing automation
- Playback & Evaluation
- Listen to the final group movement via speakers (Decoder) or headphones (Binaural Decoder).
Finalizing & Exporting
For a compact dedicated rendering guide, see Render B-Format in REAPER.
Pre-Render Checklist
Before rendering, confirm:
- Bformat Master is soloed
- Ambisonics format/order matches your target pipeline
- No unintended limiter/compressor on the master path
- Filename contains order and take (example:
scene01_O5_take03.wav)
- Rendering the Bformat Master
Once satisfied, export the B-format:
- Select Bformat Master track and set it to Solo
- Open Menu > Render
Render Settings:
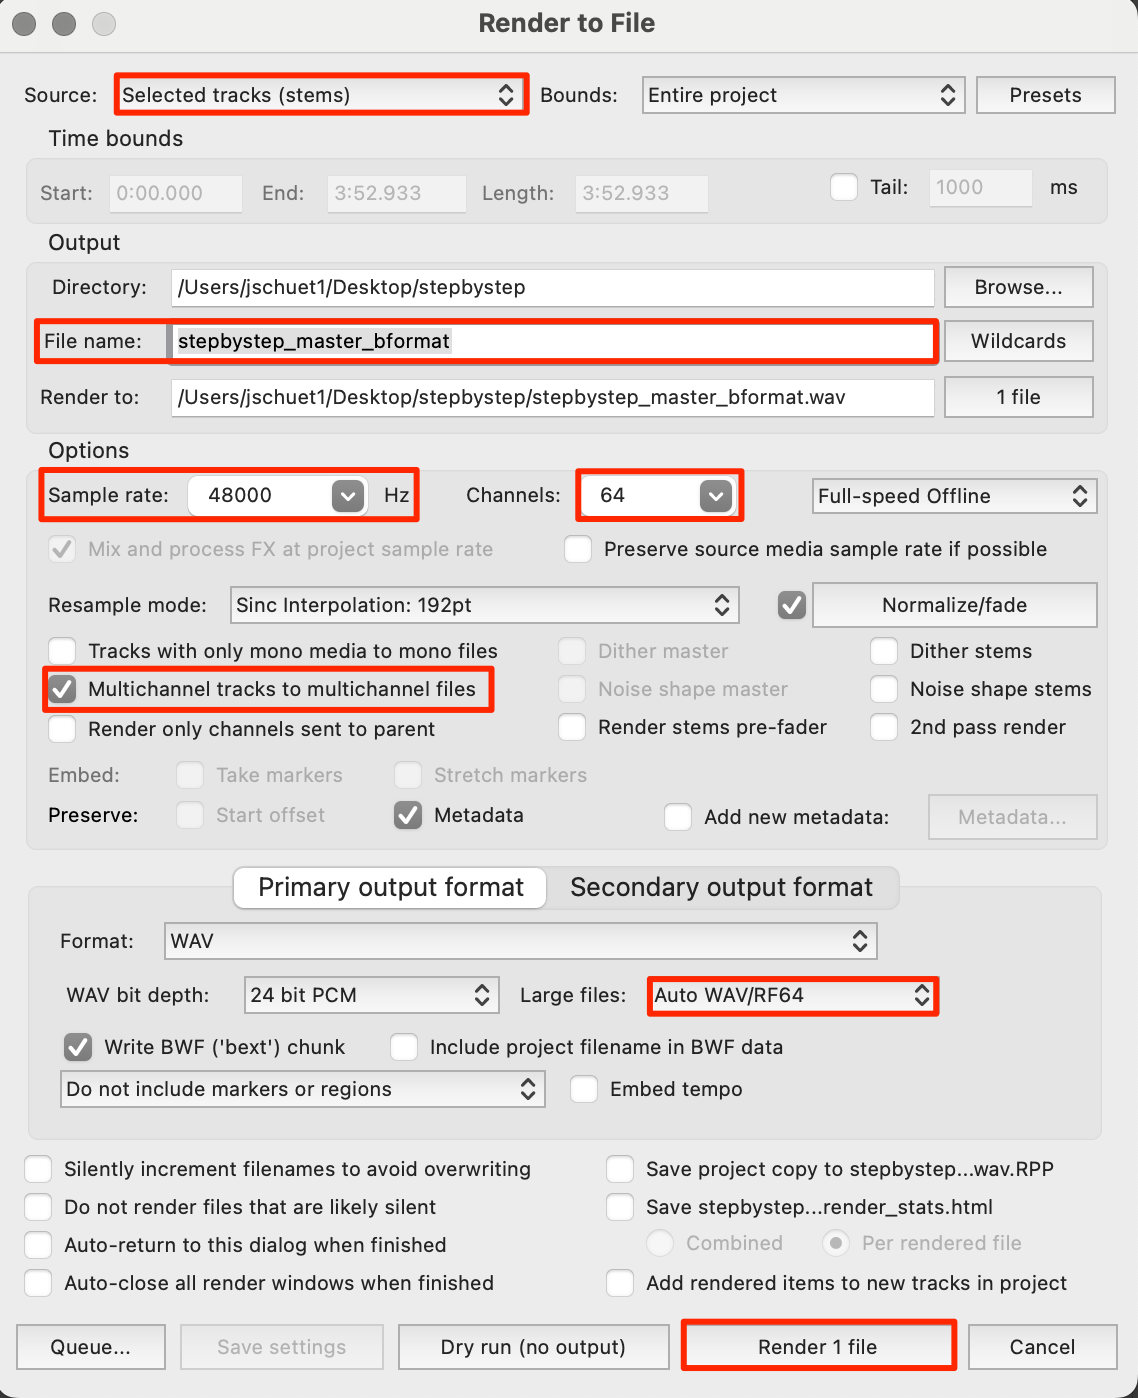
- Select Track (Stem Render) → Choose Bformat Master.
- File Name → Assign a B-Format filename.
- Sample Rate → 48,000 Hz.
- Channels → 64 (for 7th-order Ambisonics).
- Multichannel Format → Set to Multichannel Files.
- Large File Support → Use Wave/RF64.
- Click “Render”.
Rendering info:
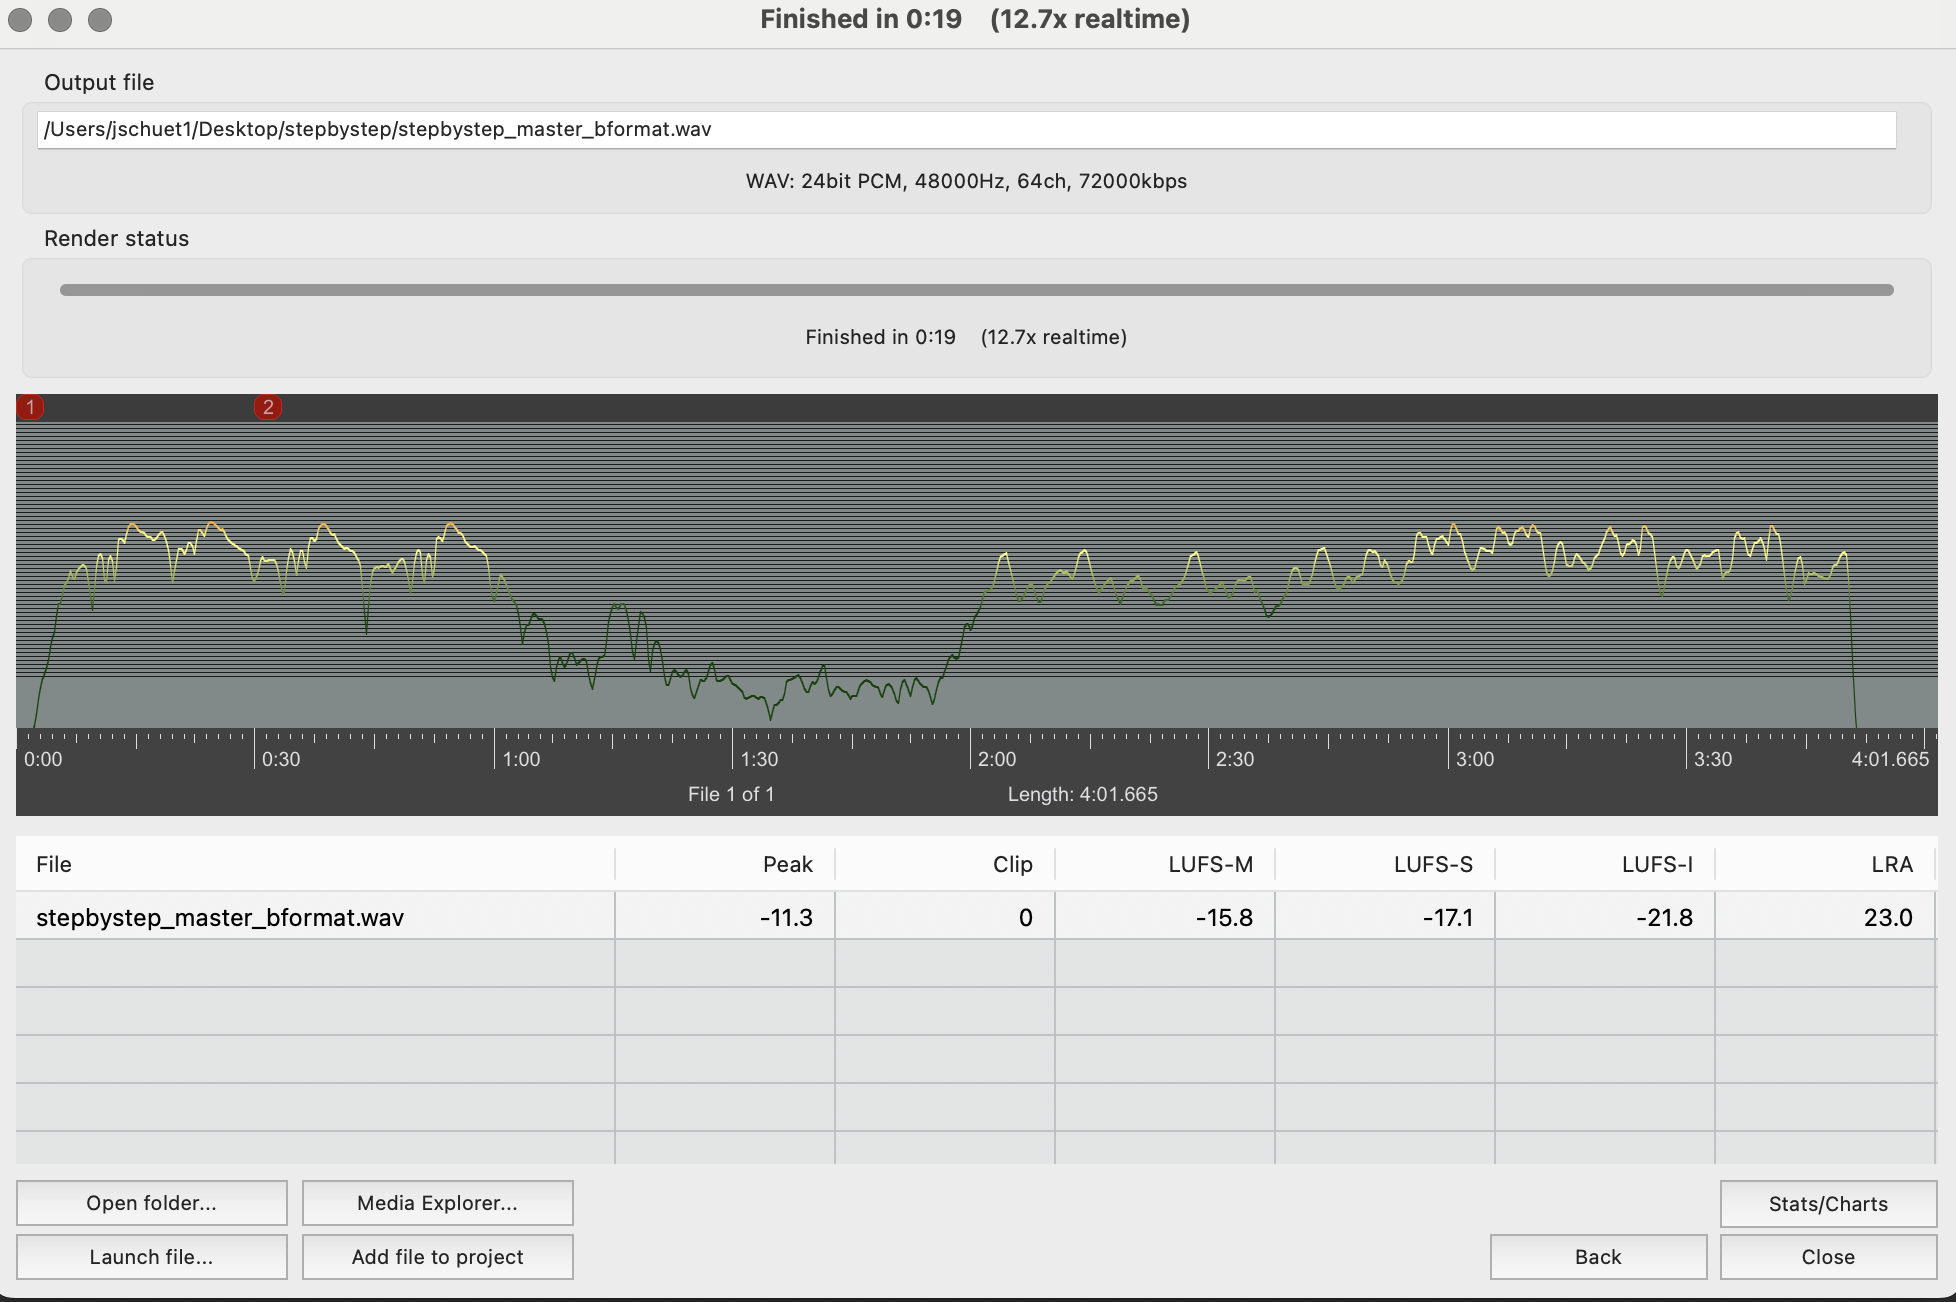 After rendering, Reaper shows a Rendering Info window with peak and LUFS values.
- Drag and drop the rendered B-format file onto the Bformat player track, set it to Solo, and verify playback through the ICST decoder or binaural decoder.
Troubleshooting (Quick)
- No movement playback: check automation lane visibility and write/touch/latch mode.
- No decoder output: verify send from Bformat Master to Decoder input.
- Wrong speaker localization: run speaker test again and verify hardware output mapping.
- Binaural only / no speakers: check mute/solo state between Decoder and Binaural track.