ICST Ambi Motion Markers
Level: Intermediate | Audience: Composer, sound designer, spatial-audio technician, student.
Use this page when you want to define AmbiEncoder movements with REAPER markers, preview them over OSC, and record them as automation.
Download first: Everything you need is in the bundle — Download ICST Ambi Motion Markers Bundle (Lua scripts, Python worker, example CSVs, handbook).
What it does
ICST Ambi Motion Markers is a REAPER workflow built around timeline markers. Instead of drawing automation curves by hand, you define positions as named markers on the timeline, then preview or record the resulting movement via OSC.
Markers are persistent and editable like any REAPER marker — you can version them in a CSV, rename them, move them on the timeline, and re-import without touching the plugin. Automation curves don’t offer that.
It lets you:
- define source positions as marker cues
- preview one pair or a whole series over OSC
- record the same movement path as AmbiEncoder automation
- import cue sets from CSV instead of typing marker text manually
The central concept is the S/E pair: S marks the start of a movement segment, E marks the end. Every preview and recording operation works on either one selected pair or a series of pairs from S to the last marker.
Requirements
Before installing, make sure you have:
- REAPER (v6 or later recommended)
- ICST AmbiEncoder installed and working — see Installation
- Python 3.9 or later — python.org/downloads
- OSC input enabled in the AmbiEncoder plugin — see OSC
Installation
1. Add the scripts to REAPER
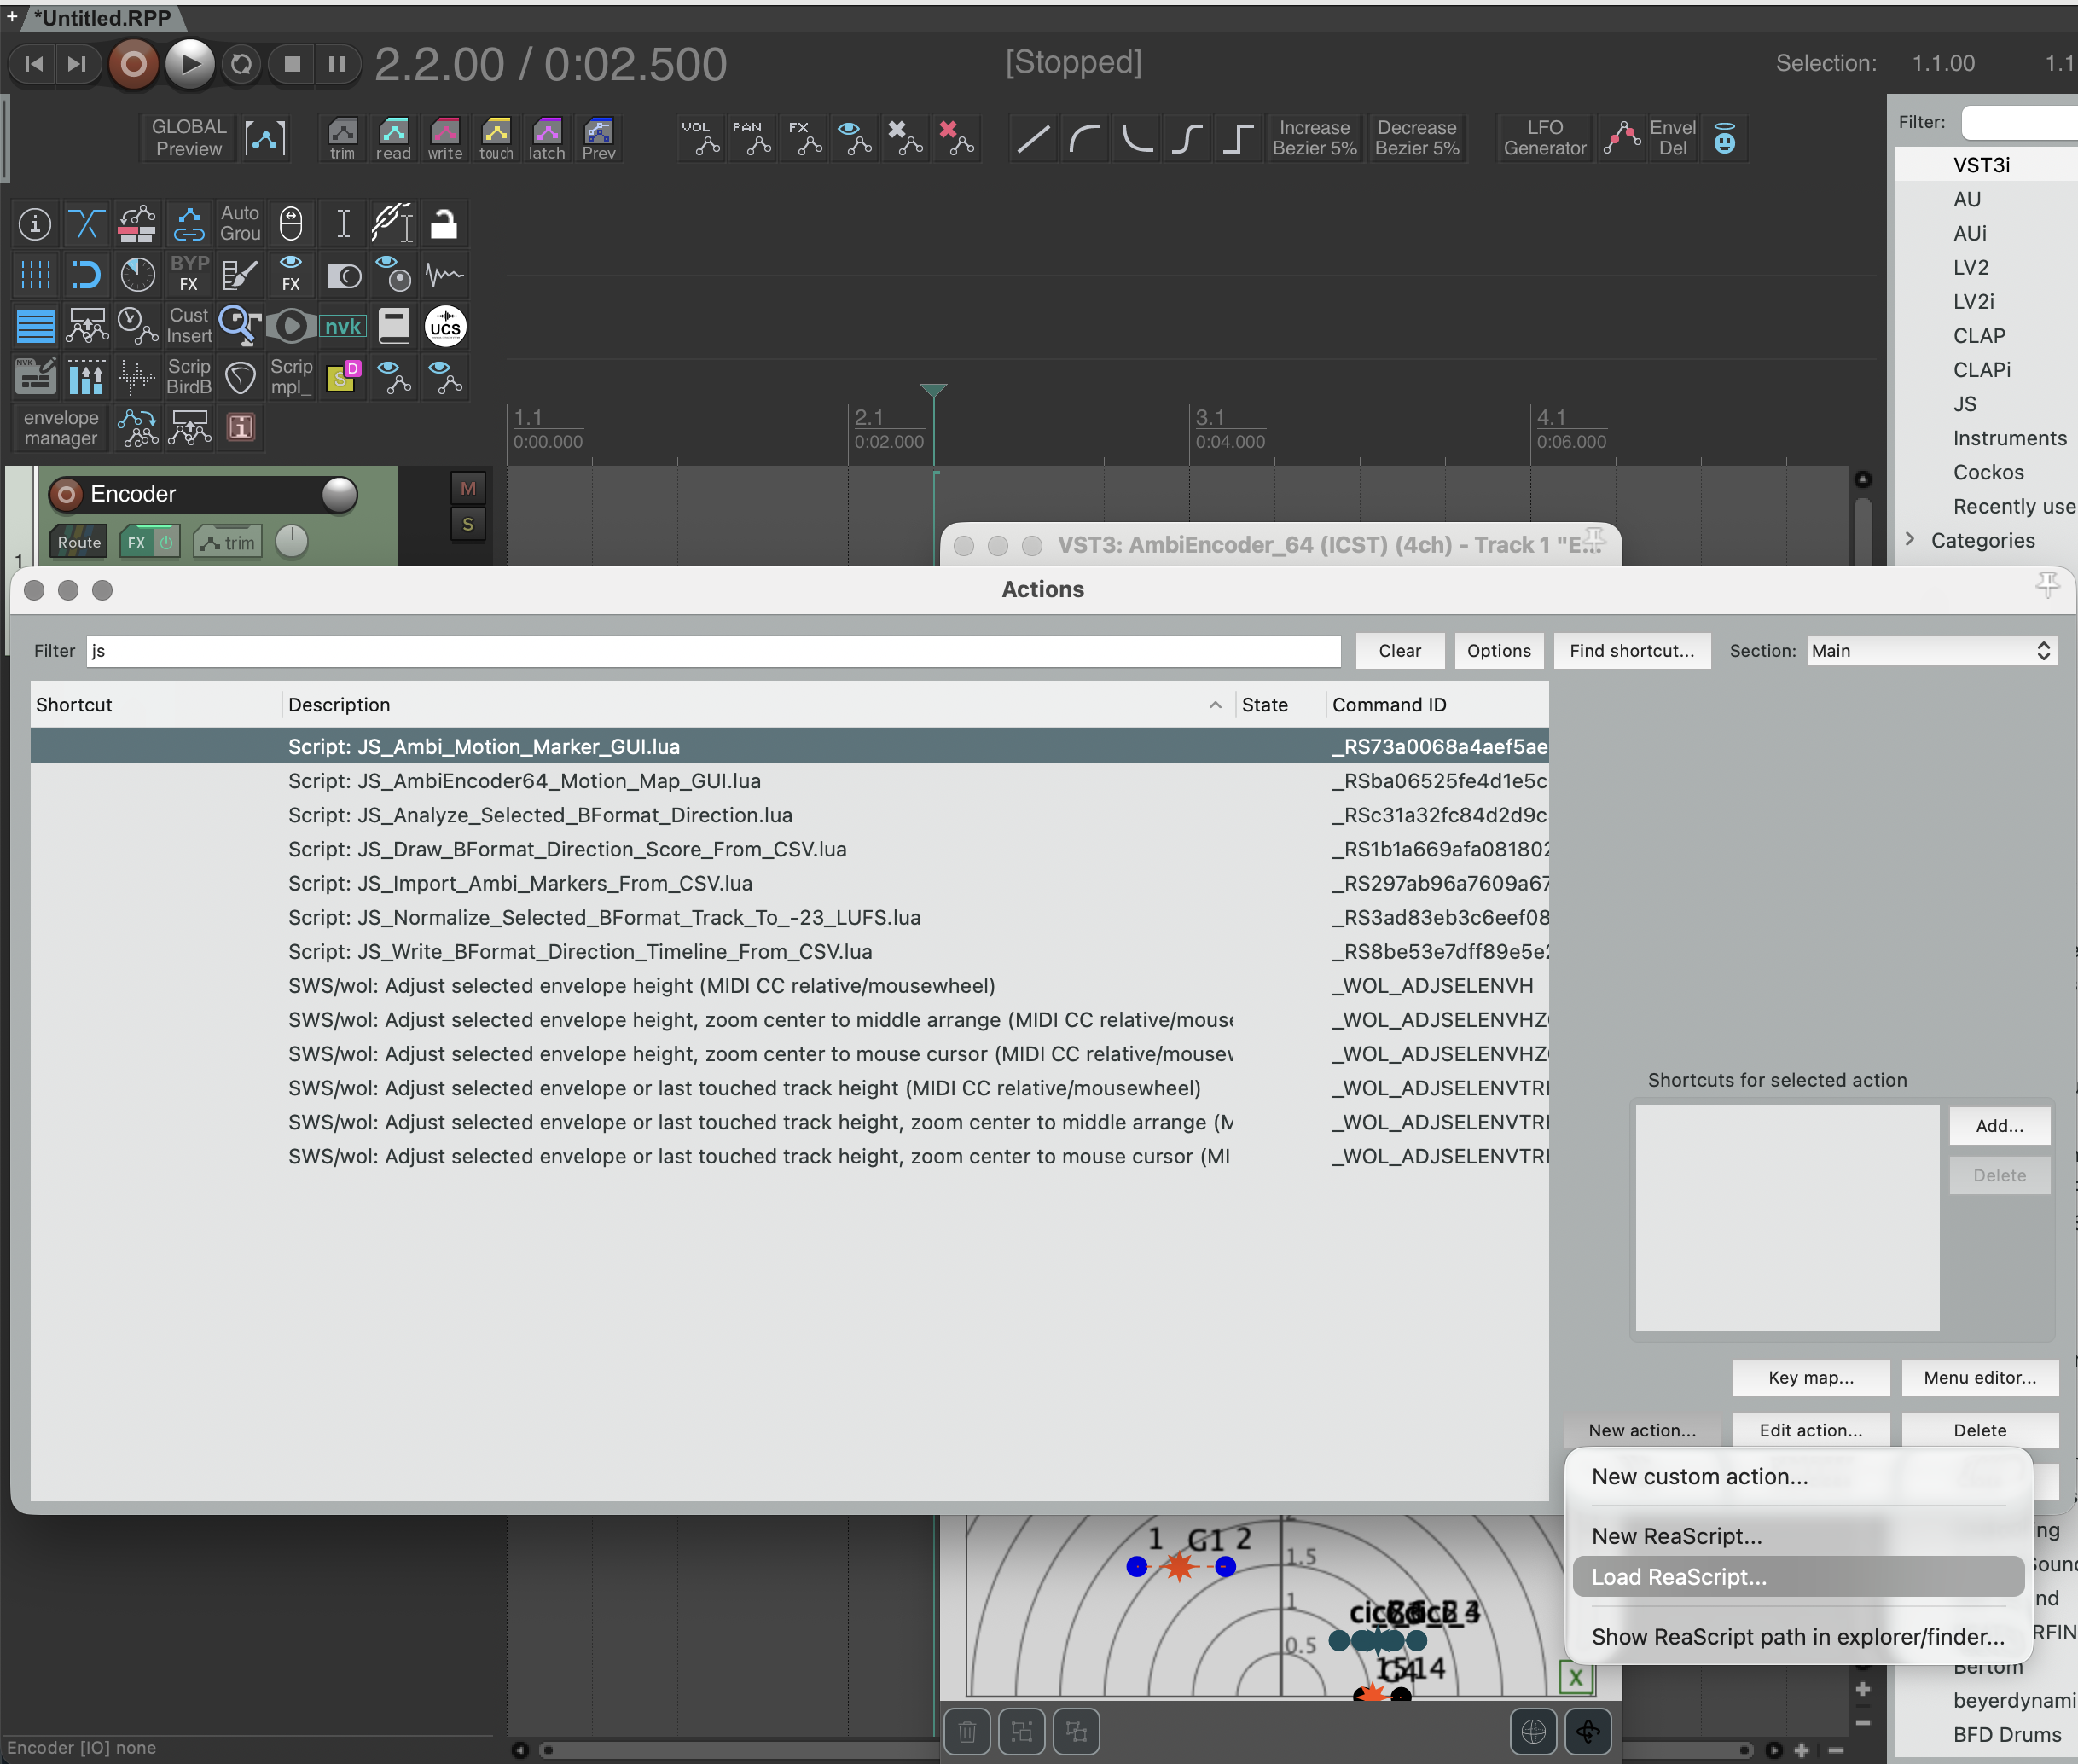
In REAPER: Actions menu → Load ReaScript… — then select each file from the bundle:
scripts/JS_Ambi_Motion_Marker_GUI.luascripts/JS_Import_Ambi_Markers_From_CSV.lua
2. Place the Python worker
The GUI launches reaper_marker_ambi_motion.py as a persistent background process to send OSC commands. Place it anywhere on disk — a common choice is alongside the Lua scripts. In the bundle it is at:
python/reaper_marker_ambi_motion.py
Install the required Python package:
pip3 install python-osc
Then set the Python executable path in the GUI (Python field). To find the correct path, run which python3 in a terminal:
# macOS / Linux
/usr/local/bin/python3
/Users/yourname/.pyenv/versions/3.11.8/bin/python3

# Windows (example)
C:\Python311\python.exe
The GUI starts the worker automatically the first time you press a button — no manual launch needed. The worker stays running after you close the GUI and is reused on the next open.
Python on Windows
After installing Python from python.org/downloads, REAPER may not detect it automatically. To find where Python was installed, open a Command Prompt and run:
python -c "import os, sys; print(os.path.dirname(sys.executable))"
Example output: C:\Users\stine\AppData\Local\Python\pythoncore-3.14-64
In REAPER, go to Preferences → Plug-ins → ReaScript and enable “Force ReaScript to use specific Python .dll…” — point it to the python3xx.dll inside that folder (e.g. python314.dll).
Then install python-osc using the same Python:
python -m pip install python-osc
3. Configure the ICST plugin
Insert AmbiEncoder_64 on the target track and enable OSC input. Make sure the plugin OSC port matches the GUI setting (default: 50001).
Installation checklist
Before your first test, verify:
- Both Lua scripts loaded Visible in Actions → Show action list as
JS_Ambi_Motion_Marker_GUIandJS_Import_Ambi_Markers_From_CSV - Python path set in GUI The
Pythonfield points to a valid Python 3 executable — test withwhich python3in a terminal - python-osc installed Run
pip3 install python-oscfor the same Python executable - AmbiEncoder OSC input active Plugin → OSC In enabled, port matches GUI setting (default
50001)
First steps
Everything below assumes installation is complete and the GUI is open (run JS_Ambi_Motion_Marker_GUI.lua from the Actions menu).
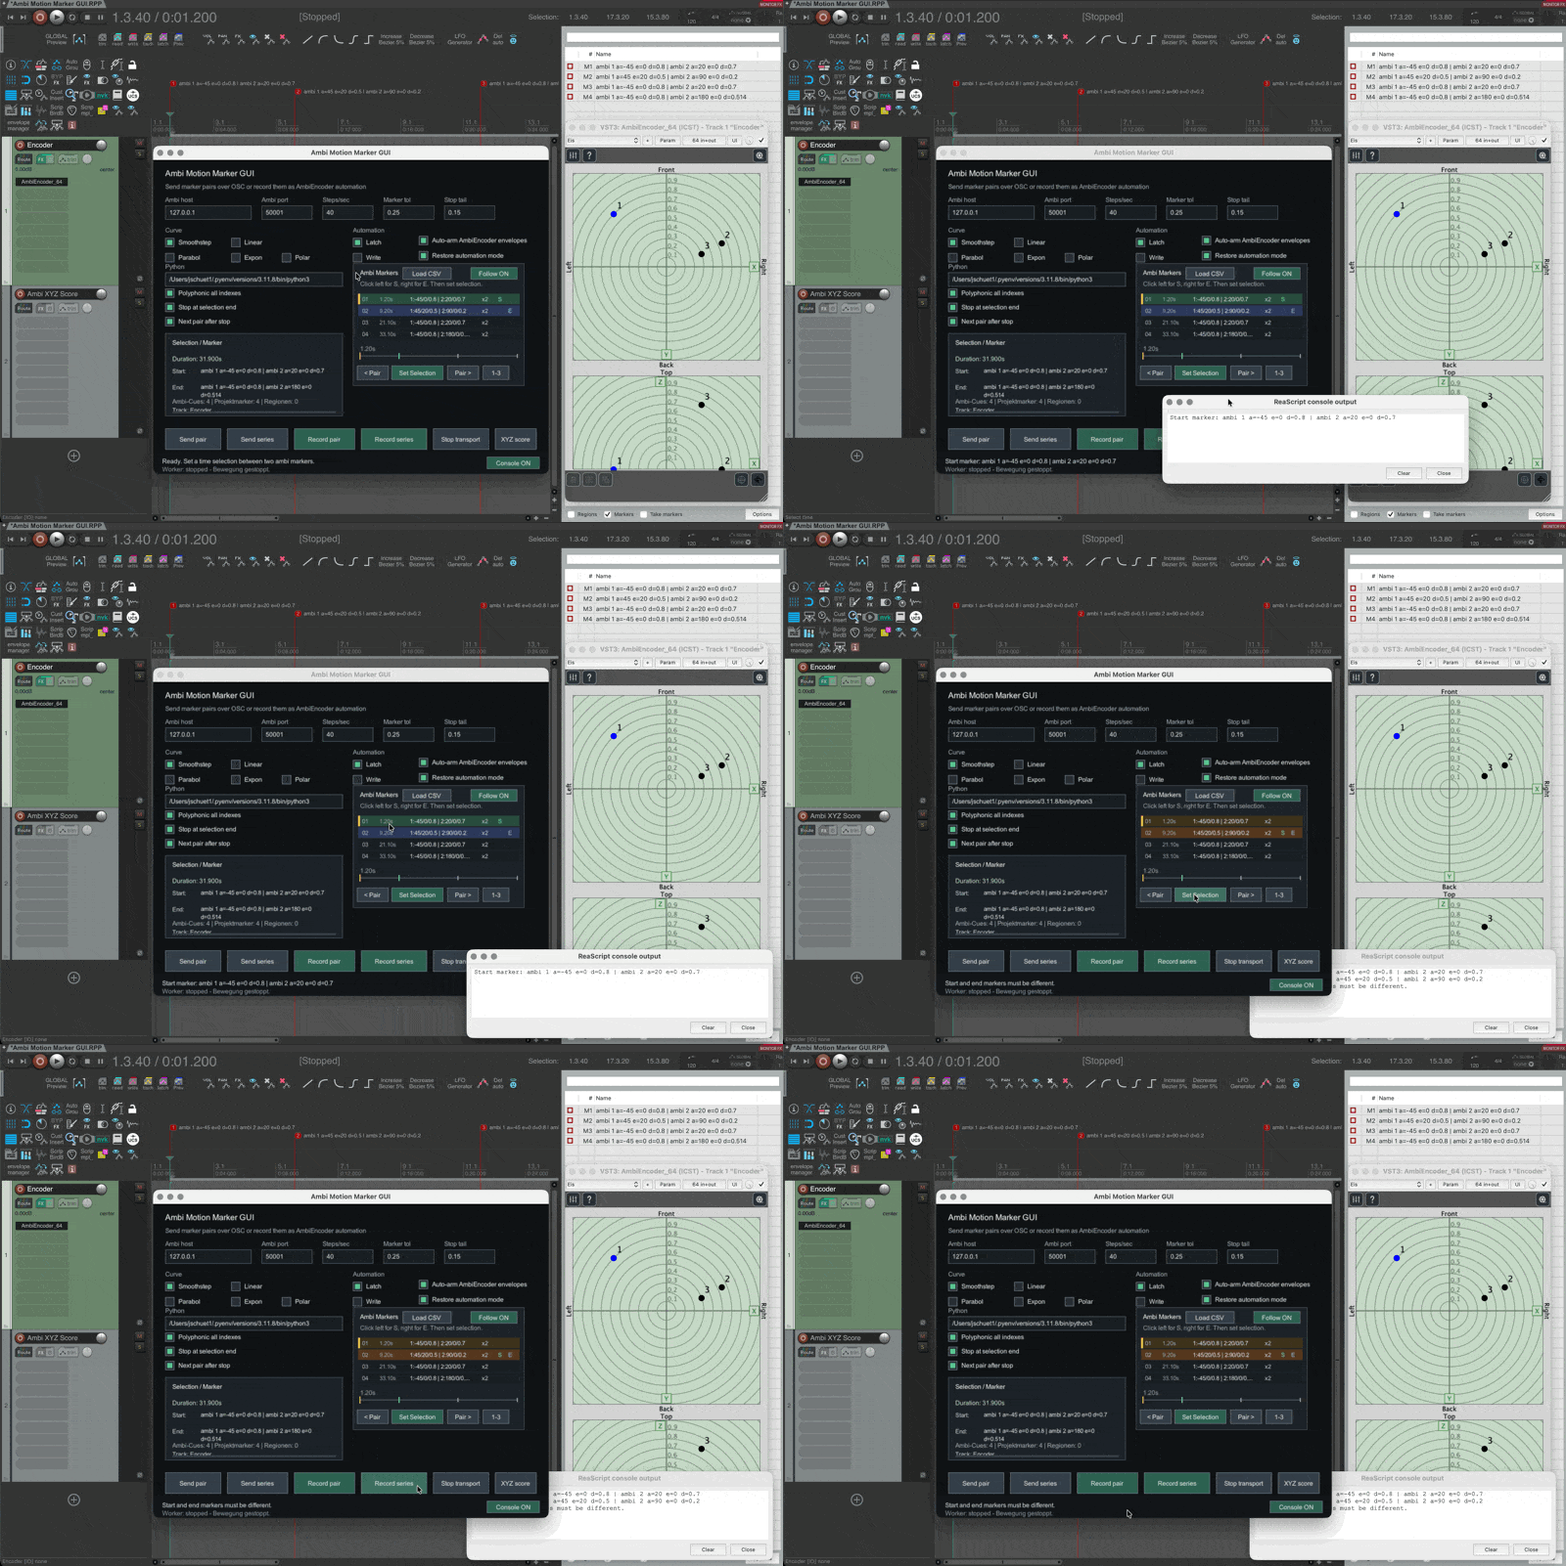
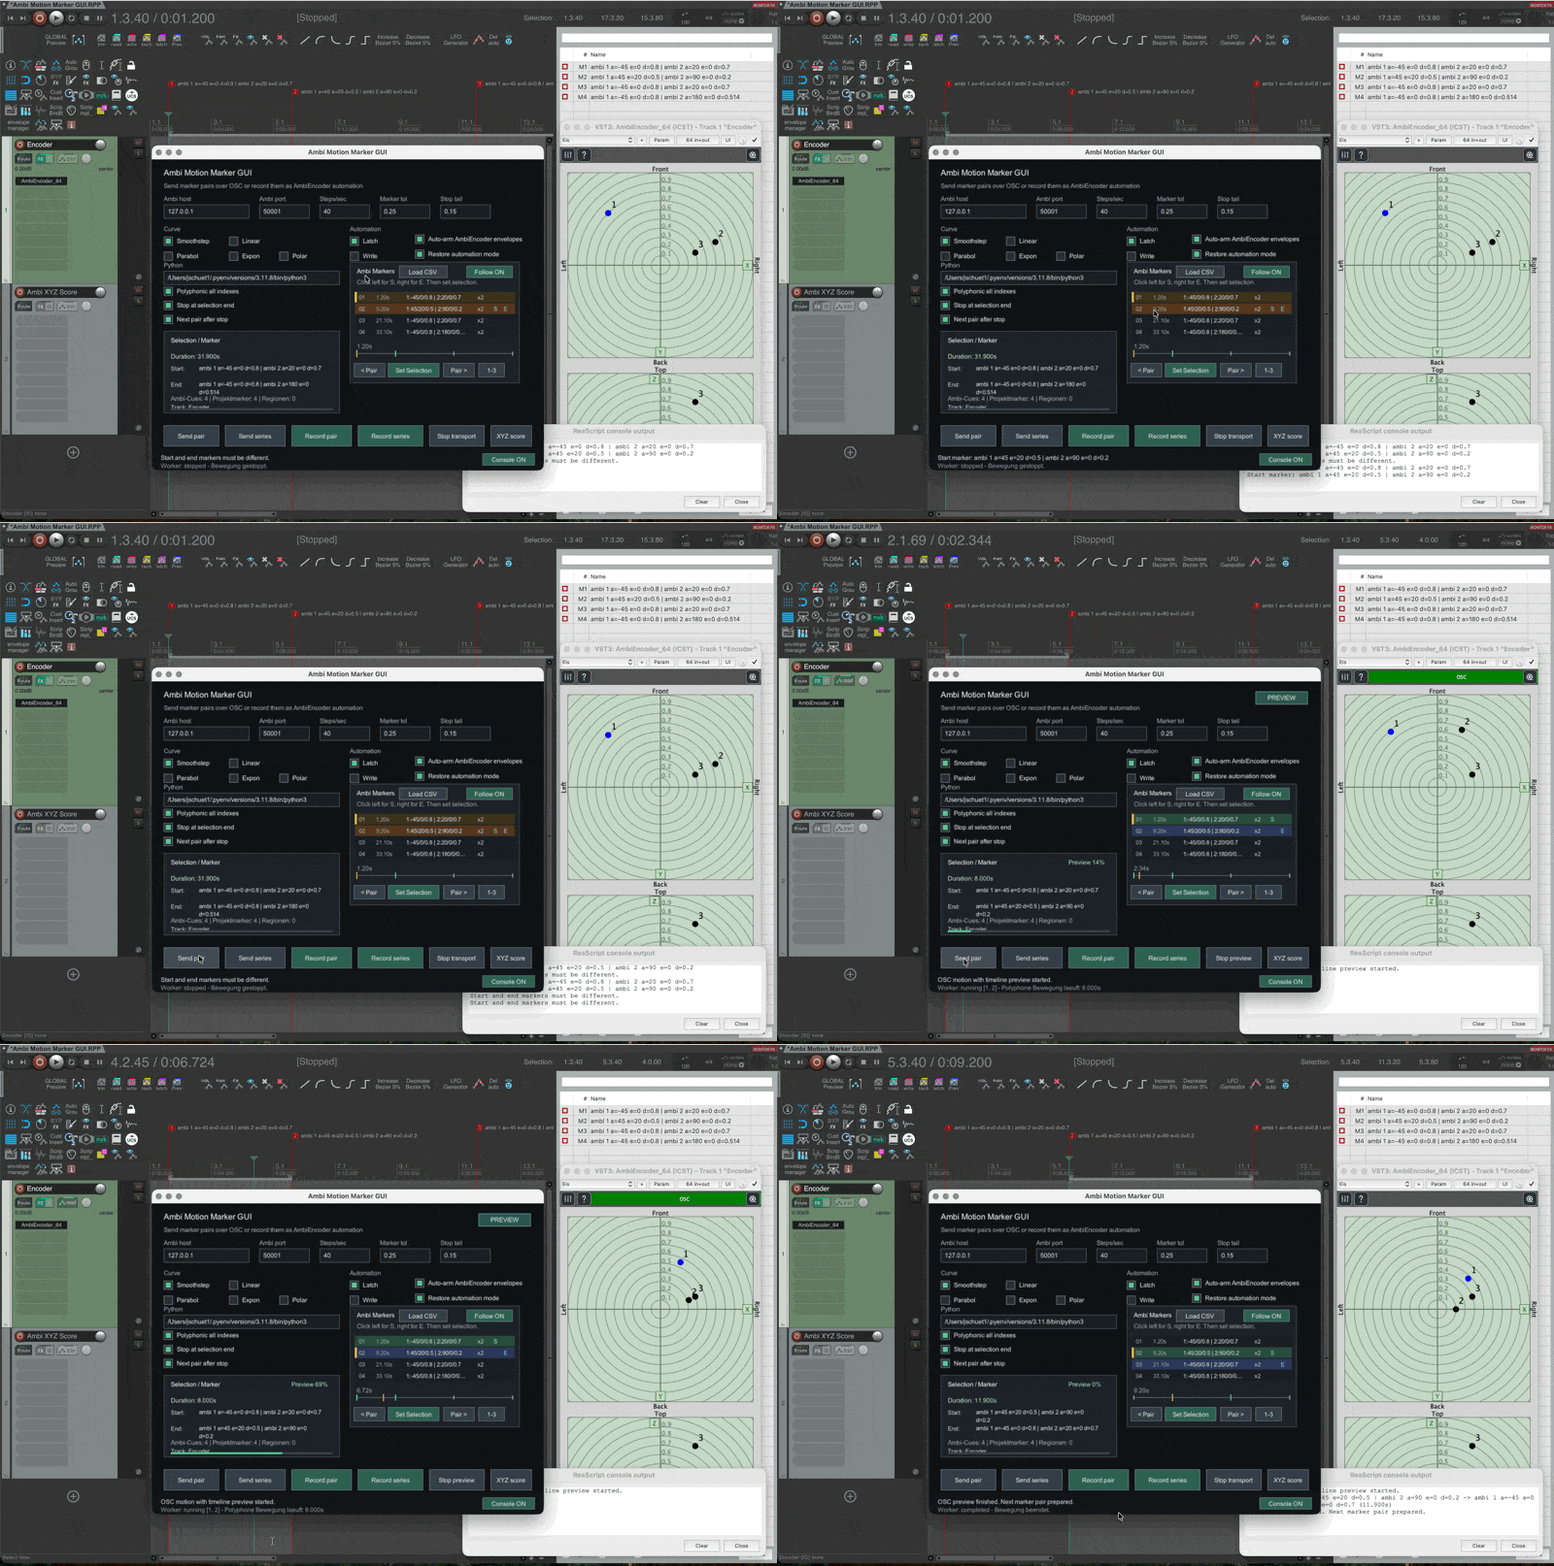
S/E pairs: In the GUI marker list, click the left half of a row to mark it as S (start), the right half to mark it as E (end). Then click Set Selection — this creates the REAPER time range the GUI will use for preview and recording.
Marker names follow this pattern: ambi 1 a=-45 e=0 d=0.8 — source index, then azimuth / elevation / distance. The GUI only recognises markers whose name starts with ambi. You can add markers manually in REAPER or import them from a CSV file.
1. Preview a single movement
- Add two markers in REAPER — for example
ambi 1 a=-45 e=0 d=0.8andambi 1 a=45 e=0 d=0.8— or import a CSV - In the GUI marker list, set
Son the first marker andEon the second - Click
Set Selection, thenSend pair - The source moves in the AmbiEncoder plugin
What you should see: the preview cursor moves across the time selection, OSC output appears in the console, no automation is written.
2. Preview a full series
- Set
Son the first marker of your phrase - Click
Send series - The GUI steps through all segments to the last marker automatically
3. Record a pair as automation
- Select the AmbiEncoder track in REAPER
- Set
SandE - Click
Record pair
What you should see: the transport runs, the plugin moves, and the automation lanes receive position data.
4. Record a full series
- Select the AmbiEncoder track
- Set
Son the first marker - Click
Record series
The transport runs through the complete series and writes automation for each segment.
Marker workflow
Coordinate system
AmbiEncoder uses spherical coordinates — azimuth (a), elevation (e), and distance (d):
| Parameter | Range | Description |
|---|---|---|
a azimuth | −180 … +180° | 0° = front, −90° = left, +90° = right, ±180° = back |
e elevation | −90 … +90° | 0° = horizontal plane, +90° = directly above, −90° = directly below |
d distance | 0.0 … 1.0 | 1.0 = unit sphere surface; values above 1 place the source outside the sphere |
The XYZ conversion used internally follows the ICST convention: X = D·cos(E)·sin(A), Y = D·cos(E)·cos(A), Z = D·sin(E).
Marker syntax
Markers are named with position data in this form:
ambi 1 a=-45 e=0 d=0.8
ambi 2 a=20 e=0 d=0.7
1 / 2 = source index, a = azimuth, e = elevation, d = distance.
Multiple sources at the same cue point can be combined in one marker:
ambi 1 a=-45 e=0 d=0.8 | ambi 2 a=20 e=0 d=0.7
Setting S and E
In the GUI marker list, each row represents one marker. Click the left side of a row to mark it as S (start), the right side to mark it as E (end). Then click Set Selection to create the REAPER time range between them.
S and E together define one movement segment — from the source position at S to the position at E.
Import cues from CSV
Manual markers work well for a handful of cues. Switch to CSV once you have more than six or seven positions, when coordinates come from a score or a spatial planning spreadsheet, or when you want to version the cue set alongside your project in git. You edit the CSV, click Load CSV once, and all markers update — no retyping.
Format: AED
time,index,source,azimuth,elevation,distance
1.2,1,1,-45,0,0.8
1.2,1,2,20,0,0.7
9.2,2,1,45,20,0.5
9.2,2,2,90,0,0.2
Format: XYZ
time,index,source,x,y,z
1.2,1,1,-0.566,0.566,0.000
1.2,1,2,0.239,0.658,0.000
Importing
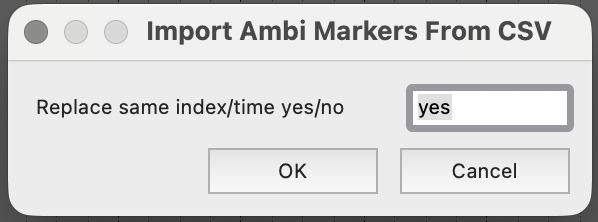
- click
Load CSVin the marker panel - choose your CSV file
- matching markers in the project are replaced automatically
Example CSV files are included in the bundle: ambi_markers_aed_example.csv and ambi_markers_xyz_example.csv.
Main controls
Send pair
Sends the currently selected S → E pair over OSC — the source moves in the plugin, but no automation is written. Use this to test and refine a single movement segment before recording.
During playback, the REAPER edit cursor moves in real time across the time selection and a PREVIEW indicator appears top right. Click Stop preview to stop both the cursor and the OSC motion together.
Send series
Sends all segments from the current S marker to the last marker in the list, one after another. Use this to preview a complete phrase or scene.
Record pair
Arms the AmbiEncoder track and records the selected S → E movement as automation. Make sure the AmbiEncoder track is selected before clicking.
Record series
Same range logic as Send series, but writes automation for every segment while the movement plays through. The transport runs once from the first to the last ambi cue without stopping; the worker status shows Segment 1/N, 2/N, and so on.
Interpolation modes
The Curve dropdown controls how the source moves between S and E:
| Mode | Character |
|---|---|
Linear | Straight line in XYZ space — constant speed |
Parabol | Soft start and soft end — quadratic easing |
Expon | Very soft start, fast middle, soft end |
Polar | Arc in AED space — azimuth/elevation move as angles, not as an XYZ line through the sphere |
Smoothstep | Neutral smooth curve — kept for compatibility |
Polar is the right choice when you want the source to sweep an arc rather than cut straight through the interior of the sphere.
Marker list navigation
- Click the left half of a marker row → set as
S(start) - Click the right half → set as
E(end) < Pair/Pair >— shift the selected pair one step through the marker sequence (e.g.1→3becomes2→4)Follow ON— the marker list scrolls to keep up with the play cursor or edit cursor- The small timeline bar at the bottom shows marker tick positions and the current cursor location
Next pair after stop
When enabled, the GUI automatically advances the selection to the next pair after a preview or recording finishes — 1→3 becomes 2→4, ready for the next trigger. It does not start the next movement automatically.
Polyphonic mode
Polyphonic all indexes sends every matching ambi <index> pair simultaneously, not just the first found. If source 1 and source 2 both have a cue at S and at E, both move at once. Sources that appear at only one end are skipped.
XYZ Score
The XYZ score button creates or updates a track called Ambi XYZ Score. For each neighbouring cue pair, a muted empty item is placed on that track. Item notes contain the XYZ coordinates for each source at start and end:
XYZ 01  0.50s -> 16.50s
1: (-0.566, 0.566, 0.000) -> (0.332, 0.332, 0.171)
2: (0.239, 0.658, 0.000) -> (0.200, 0.000, 0.000)
This gives you a readable score view of all spatial movements without opening the GUI. Clicking XYZ score again replaces only the GUI-generated items; anything else on the track is left untouched.
Good practices
- use CSV as the source of truth for larger cue sets — easier to edit and version than manual markers
- always preview with
Send pairbefore recording to check the movement looks right - keep marker indices stable across revisions — renumbering breaks CSV re-imports
- use one source per CSV row
- keep start and end cues musically meaningful (at phrase boundaries, not mid-gesture)
- enable console output when debugging, disable it during performance work
Troubleshooting
“No markers or regions with ‘ambi…’ found”
The marker list is empty. Add markers manually or run Load CSV. Make sure each marker name starts with ambi (case-sensitive).
No motion in the plugin
Check:
- OSC input is enabled in the AmbiEncoder plugin
- the OSC port in the plugin matches the port in the GUI (default: 50001)
SandEpositions are actually different — identical positions produce no visible movement
Send series behaves like Send pair
There is only one segment left between the current S marker and the last marker. Set S to an earlier marker.
Python not found / worker fails to start
- confirm the path in the
Pythonfield points to a valid Python 3 executable (which python3on macOS/Linux) - confirm
python-oscis installed for that specific Python:your/python/path -m pip install python-osc - check the console output in the GUI for the exact error
CSV import fails
Check:
- column header names match exactly (
time,index,source, then position columns) - decimal points (not commas) for numbers
- one source per row
- valid time values and indices
See also
ICST Ambi Motion Map — algorithmic movement generator for AmbiEncoder_64. Assign motion shapes (circle, spiral, Lissajous…) per source and write XYZ automation in one click. Use Motion Map when you need generative spatial textures; use Motion Markers when you need musically timed, cue-defined movement.